Start Pages
A start page is the first page that displays after an insured logs in
to the Self-Service Portal. You can manage what your insureds see in this
area, such as common functions or frequently used links. You may choose
to create multiple start pages to cater to different clients (such as
personal lines and commercial lines clients). You must configure features
in Menus to make them available for selection
as start page options.
Click Start Pages
on the navigation panel in Self-Service
Admin.
Convert an Existing Start Page
You must convert your Applied CSR24 start pages to the updated version.
If you do not migrate your pages to the latest version, insureds receive
an error message when they attempt to access them. Start pages that have
not been converted to the latest version are denoted with a red Needs
Conversion label in the start page list.
- Select a Start
Page.
- The Start Page Conversion
page displays. In the Feature Selection
section, select up to three supported features to convert.
- The Link Containers Converted
section displays link containers that will convert to the new version.
If necessary, click a link icon
to change it.
- The Features with No Conversion
section displays obsolete features that will not convert.
- Click Convert
on the options bar to convert the start page, or click Convert Copy to create a converted copy
of the start page.
- The Start Page Edit screen
displays for the converted page or the converted page copy, depending
on your selection.
- If you convert a copy of the start page, users who were associated
to the start page do not migrate to the new page automatically. You
must add these users manually.
Note: You
can also assign a start page to an individual user with the Users
feature.
- Select a Start
Page.
- The Start Page Edit
page displays. Click Assign
Users on the options bar.
- The Users list displays.
To filter the list in the Search
panel, type all or part of the user’s name
or login
username, or select the group
and/or start
page on the corresponding dropdown menus, then click Find.
- Select the checkbox for each user
you want to assign to the page, or click Select
All on the options bar to select all users.
- Click Save
on the options bar.
Add a Start Page
- Click Add on the options bar.
- Enter a Name and Description of the
new start page.
- Select a Start Page Template if you wish to copy
the settings on an existing start page, or leave the default selection
of Blank Page to start from scratch.
- Click Save.
- Edit the remaining features and assign users to the page. See below
for instructions.
Copy a Start Page
- Click the page you wish to copy.
- Click Add Copy on the options bar.
- Update the Name and Description of
the new start page.
- Edit the remaining features and assign users to the page.
See below for instructions on each section.
Edit a Start Page
To edit a start page, click to open it and then make the desired changes.
Assign Users to a Start Page
Note: You
can also assign a start page to an individual user with the Users
feature.
- Click the page you to which you wish to add users.
- Click Assign
Users.
- To filter the list enter at least on letter in the user's Name or select
the appropriate Group
or Start Page.
Click Find.
- Select the checkbox for each user you wish to assign
to the page, or click Select All on the options bar
to assign all users in the list to the page.
- Click Save.
Screen Sections
The start page is divided into the following sections:
Navigation Menu

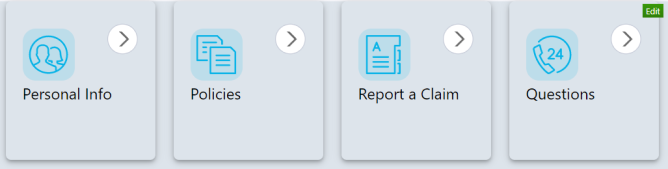
Quick Links
This section contains four tiles to setup your most frequently accessed
pages. You can have a minimum of two and a maximum of four tiles in your
Quick Links.
- Hover over the Quick Links area to activate the Edit
button and then click Edit.
- To change a quick link option, hover over the item you wish to
update in the Quick Links list to activate the Edit
button and then click Edit.
- Edit the Link Description.
- Choose the appropriate Link Type:
- Menu Link: Link to a document created with Form
Designer or to an Applied CSR24 menu item.
- Select an item from the CSR24 Menu.
- Choose a CSR24 Menu Item.
- Custom Link: Link to
another web page.
- Choose a Custom Form if applicable, or enter
a URL.
- Select the Open Target in New Window checkbox
if you want the linked item to open in a new tab or web page.
- To add an icon to display to the left of the item in the list,
click Browse. In the pop-up window that displays, make
a selection in the Choose a Category dropdown menu and
click on the desired icon.
- Click Save.
Delete a Quick Link
- Hover over the Quick Links
area to activate the Edit
button and then click Edit.
- To delete a quick link option, hover over the item you wish to
delete, and then click Edit.
- Click Delete
on the options bar.
- You are prompted to confirm the deletion. Click Yes.
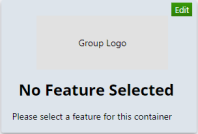
Contacts Feature
The Contacts Feature allows you to display CSR24 Contacts, Portal User
Contacts, or no contacts. You can also add a Group Logo if you have User Groups setup.
- Hover over the Feature
area to activate the Edit
button, and then click Edit.
- Select one of the following, and then click Save.
- None
(Empty): If you do not wish to display any contacts, leave
the area blank. For example, you may want to display your Group
Logo only.
- CSR24
Contacts: Displays the contacts assigned to the insured
in the Applied CSR24 system. Enter an introduction to the servicer
type in the Name field,
like Contact Your Agent or Meet Your Team. Select one
or more servicer types: Producer,
CSR or Additional
Servicer.
- Contacts
(Portal Users): Use this option if you wish to select the
contacts and/or include pictures of the contacts. Enter an introduction
to the contact(s) in the Name
field, like Contact Your Agent
or Meet
Your Team.
Features
There are two containers available for adding features. You can customize
your feature to contain a bulletin board, RSS feed, new Epic documents,
MobileInsured information, or content from Applied Marketing Automation.
You also have the option to leave a feature empty if you require more
white space.
Bulletin Board
Use the space for announcements.
RSS Feeds
- Enter a Name for the feed.
- Enter the URL for RSS feed.
- Select the appropriate Type of feed.
New Epic Documents
This feature displays shared attachments from Applied Epic that the
insured has not yet accessed. This includes only attachments added to
Applied Epic within the past 90 days. The documents automatically populate
with their file name, folder location, and the date and time at which
they were uploaded.
MobileInsured Info
This feature displays a preview of your MobileInsured application, Apple App Store and Google
Play Store links, and your selected description. Under the Feature Values section, select
to include the Full
App Description, the Short
App Description, or a Custom
Description. If you select Custom
Description, enter the description
in the corresponding field that displays below.
Note: A
QR code displays in this feature that allows the insured to be directed
to your app on the Apple or Google Play store.
Applied Marketing Automation (AMA)
This feature displays previews of the first three pieces of Applied
Marketing Automation content you have shared with the insured. A View All button
also displays, which opens a new window that displays all of the Marketing
Automation content you have shared with the insured. If you do not currently
use Marketing Automation but would like more information about adding
it to your solution portfolio, contact your Applied Sales representative.