Holder Packs
Certificates issued with
a custom sort order allow you to save PDF copies to your local drive if
your system is set up to do so.
Configure certificate holder packs
To enable this option,
follow these instructions.
From the Home screen,
do one of the following:
Click Configure
on the navigation panel.
Click the down
arrow next to Home
on the menubar and select Configure.
Click Areas
> Configure on the menubar.
From any other area of the program, do one
of the following:
Click Proofs on the navigation panel, or Areas > Proofs
on the menubar.
Click Certificates on the navigation panel.
Click the appropriate
certificate
in the list, and then do one of the following:
Click the Edit button
 to the left
of the list.
to the left
of the list.
Click File > Open
on the menubar.
Double click
the certificate.
In the Destination
Folder section of the Certificate
Options tab, click Browse
and choose a folder to specify as the default destination folder.
Select the appropriate checkboxes
to specify the kinds of documents to save as PDF files:
Save local
copies of certificate to PDFs
Save holder
pack to local drive
Save client
pack to local drive
Note: Anyone
using this feature must have the
specified folder in the correct location on their local drive.
Click
Finish
or press [Enter].
Set the distribution order
when issuing certificates
Setting
the distribution order allows you to specify the order in which the holders
will print, and it also allows you to save a PDF copy of the certificate
to a specified location on your local drive.
When issuing certificates on large accounts, you might be producing two
packs: a client (insured) pack and a holder pack. In the client pack,
the certificates issued for each holder on the policy should be ordered
by the Set Distribution Order.
The Holder pack, on the other hand, should be ordered based on the number
of pages that make up each certificate so that all one-page certificates
print together followed by a separator page with the Heading "One
Page Certificates." Two-page certificates print together next, and
then a separator page, and then three-page certificates and so on.
Once the certificates print, you can use the separator page to quickly
separate the documents by page number to be fed through an envelope stuffing
machine.
To set
the distribution order, click the Holder
Distribution tab when performing the Issue
a Certificate workflow and perform the following actions.
- Click the Set
Distribution Order link label.
Select
the appropriate radio
button:
- Holder Name
- Named Insured, Holder Name
- Named Insured, Holder State, Holder Name
- Named Insured, Insured City, Holder Name
- Client Output Category, Holder Name
- Custom Sort
- If you choose Custom
Sort, select a 1st
Sort Order, and optionally choose a 2nd
Sort Order and 3rd
Sort Order.
- If your system is configured to save
a PDF copy of the certificate to a specified location on your local
drive, the default destination folder displays in the field. Click
the Browse
button if you would like to specify a different folder for the PDF
output. Select the Save
local copies of certificate PDFs checkbox if you wish to save
a PDF copy of the file.
- If these options are available to
you, optionally select the Group
certificates by number of pages and/or Print
separator page checkbox.
- Click Preview
to preview the order in which the holders will print.
Click Finish
to return to the Issue Certificate
screen.
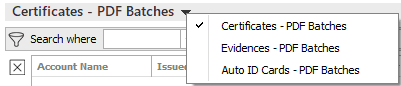
Send the PDF batch to a drive
Certificates, Evidence, and Auto IDs issued with a custom sort order
allow you to save PDF copies to your local drive if your system is set
up to do so. The Send PDF Batch to Drive feature allows you to move these
PDF batches with one action. From there, you can burn the files onto a
CD.
Supported file types that will convert to a PDF through the Distribution
Manager are .PDF, .DOC, .DOCX, .DOCM, .XLS, .XLSX, .XLSM, .CSV, .TXT,
.TIF, .TIFF, .GIF, .GIFF, .JPG. .JPEG, .JPE, .BMP, and .MSG
From the Home
screen, do one of the following:
- Click Procedures
on the navigation panel.
- Click Areas
> Procedures on the menubar.
- Click the down
arrow next to Home
on the options bar and select Procedures.
From
any other area of the program, do one of the following:
- Click
the down
arrow to the right of the Home
options bar button and select Procedures.
- Click
Home
> Procedures on the menubar.
- Click Policy
on the navigation panel, or Areas,
Policy on the menubar.
- Click
Send PDF Batch
to Drive on the navigation panel.
- Change the
PDF batches that display in the list if necessary.
- Deselect
the checkbox
for any item you do not want to include in the batch.
- Do one
of the following:
- Click
Actions >
Save PDF Batch to Drive on the options bar.
- Click
Actions >
Save PDF Batch to Drive on the menubar.
- You are prompted, "Do you wish to save the selected PDFs to
the drive?" Click Yes.
- The PDF files are sent to the folder specified in Certificate Configuration.
 ) to narrow the list of batches.
 to add filters.