Add an Evidence of Property
- Locate the
customer in question and access
the Proofs of Insurance area .
- Click
Evidences
on the navigation panel below Proofs
of Insurance.
Note: You
can access evidences of property from the Policies area by clicking
Actions > Proofs > Evidence
of Property on the options bar or menubar.
- Do one
of the following:
- Click
the Add
button
 to the left of the list.
- Click
New >
Proofs and Evidence
of Property or Evidence
of Commercial Property on the options bar.
- Click
File >
New >
Proofs and Evidence
of Property or Evidence
of Commercial Property on the menubar.
- With focus on the evidences
list, press [Insert]
on your keyboard.
- Press
[Ctrl]+N.
- Choose
the correct evidence of property Type
in the dropdown menu:
- Evidence
of Commercial Property Insurance
- Evidence
of Property Insurance
- Enter
a Title
for the evidence.
- In the
Line of Business section,
choose a Type
and Service Summary.
Note: to
include history items in the list of lines of business, select the
Include history
checkbox before selecting a Type.
- In the
Additional Lines of Business
list, select the checkbox
next to each item to be included on the evidence of property.
- If you
wish to default additional interests from an existing evidence, click
the Add
button
to the left of the bottom list. The Default
Additional Interests window displays.
Make a selection in the Default
additional interests from dropdown menu.
Select the applicable checkbox(es):
- Default
the additional interests special conditions
- Default
the additional interests attachments
Click
Add to add
the selected additional interests and default interests from another evidence.
Click Finish
to add the selected additional interests and return to the evidence of
property workflow.
Click Cancel
to close the Default Additional Interests
window without defaulting additional interests from another evidence.
Note: You will
be able to add additional interests for this evidence when you go into
the detail for the evidence.
- If you wish to remove an additional interest from this certificate,
click to highlight the interest
in the list and click the Delete
button to the left of the list.
- Click Detail
to fill out detail for the evidence of property. (Continue to step
11.)
Click Cancel
or press [Esc]
to exit the workflow without adding an evidence of property.
Click Finish
to complete the workflow at this point.
- The Evidence Detail screen
displays. The navigation panel expands to show the available categories
for the selected evidence. Click a category to show its specific sections
on the evidence. Click a specific section
to view or fill in the information related to that section.
- A form displays on the right. To expand the list, click the bottom
of the list and drag the cursor down the screen.

Links to various
forms within the evidence display in the navigation panel.
- When you have made the desired changes, click the "X"
next to the correct bulleted item in the navigation panel. Your changes
are saved automatically.

 to the right of the
  ) to narrow
the list of contacts.
) to narrow
the list of contacts. 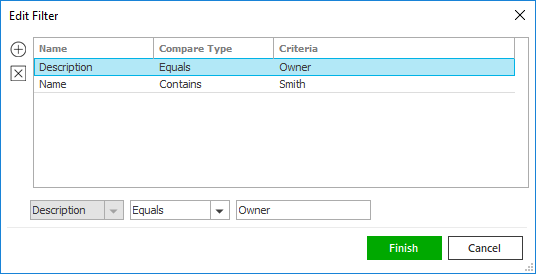

 .
. .
.