Add a Producer/Broker Payable Reconciliation
If the Journal
Entry Approval Process is enabled, only journal entries with an Approved or System
Approved status affect General Ledger balances and display on reconciliation
screens. Journal entries with a Working,
Submitted, or Rejected
status are excluded.
- Access the
Reconciliations area.
- Click
Pr/Br Payables
under Reconciliations on
the navigation panel. This option only displays if the system
setting is turned on.
- The Producer/Broker Payable Reconciliations
screen displays. Do one of the following:
- Click
the Add
button
 to the left of the list.
- With focus on the list, press [Insert]
on your keyboard.
- Press
Ctrl + [N].
The Add
Producer/Broker Payable Reconciliation screen displays.
- Click the Producer
or Broker
radio button. If the system is installed to reconcile only producers
or only brokers, the other radio button is disabled. See System
Settings Configuration.
- Commission Payable Entity
is selected by default in the Criteria
list. Optionally select Include
inactive. This option includes producers or brokers whose accounts
have been inactivated or brokers who do not have the Receivable
or Commission Payable checkbox
selected in broker detail.
Select the All
radio button to choose all entities or the Selected
radio button to choose specific accounts.
If you choose the Selected
radio button, select an entity
in the dropdown menu. Click Add.
To add another producer/broker, repeat these steps.
Selected entities display in the list at the bottom of the screen.
To remove an item from the list, highlight it and click the
Delete
button  to the left
of the list or press [Delete]
on your keyboard.
to the left
of the list or press [Delete]
on your keyboard.
- To specify the producer/broker payable contracts to include, click
the All Contracts
link label. The label changes to Selected
Contracts.
Note: Leaving
the default selection of All Contracts
also includes items that do not have a payable contract associated
to them. You may want to leave All
Contracts selected in most cases if you are reconciling producer
payables, because producer payable contracts are optional.
In the Available Payable Contracts
pop-up window, optionally select the Include
Expired checkbox. To filter the contracts that display in the
list, modify the Search where
criteria and click Find.
Select the checkbox
for each contract you want to include, or click the Select All link label to include all contracts
listed. Click Finish
or press [Enter].
- Under Month/Date, you
can filter by either Accounting
month or Payables due date.
Select the appropriate radio
button to choose how to select items to reconcile and enter
a range of dates.
You can also select Open
for the starting and/or ending date.
The Payables due
date for an item is defined by the associated payable contract.
If the item does not have a payable contract associated, the program
uses the Generate invoice
date for the item instead.
- For the Pr/Br Agency Bill Commission
and Pr/Br Direct Bill Commission
criteria, you can select Exclude,
Accrual, Partially paid, Fully paid, or Accounting
method. Accounting method
means that payables will be located based on the way your system is
installed to pay producers/brokers. You would only rarely want to
override this setting by selecting an option other than Accounting
method.
Optionally select to Include all
future commissions for items due. This option allows you to
override the selected accounting method (e.g., if you are creating
a statement for producers installed on a Partially
paid basis but would like to include all remaining commission
for the items on this statement). Selecting Include
all future commissions for items due will include all
remaining commissions, regardless of the Month/Date
and Pr/Br Agency/Direct Bill Commission
criteria selected for this statement.
Note: Your
selections here will not affect the way that Month-End posts the payable
and expense.
- The Agency, Branch, Department,
and Profit Center criteria
default to All. To change
any of these criteria, click on the appropriate line
in the Criteria list.
In the Available frame, click
the Selected
radio button. Make a selection from the dropdown menu and click Add.
Each structural entity that you add displays in the Selected
list. To remove an item from the list,
highlight it and click the Delete
button to the left
of the list or press [Delete]
on your keyboard.
- Click the Future Adjustments/Premium Revisions
line and select the Include
or Exclude radio
button.
Note:
If you opted to include future commissions in step 8, future commission
adjustments and premium revisions are automatically included.
- The Line of Business criterion defaults to All. To
modify it, highlight Line of Business and click the Selected radio button. Make a selection from the
dropdown menu and click Add.
Each line of business that you add displays in the Selected
list. To remove an item from the list, highlight it and click the
Delete button
to the left of the list or press [Delete] on your keyboard.
Note: If you are reconciling a statement for
a service only, click the Selected radio button for the Line of Business, Issuing
Company, and Premium Payable Entity criteria and select <NO VALUE> from the dropdown menu for each of these
criteria.
- For a broker statement, click Broker External/Internal
and select the External, Internal, or Both radio button.
- The Issuing Company criterion defaults
to All. To modify it, highlight
Issuing Company
and click the Selected
radio button. Make a selection from the dropdown list and click Add.
Each company that you add displays in the Selected
list. To remove an item from the list, highlight it and click the
Delete
button to the left of the list or press
[Delete]
on your keyboard.
- The Premium
Payable Entity criterion defaults to All.
To modify it, highlight Premium
Payable Entity and click the Selected
radio button.
In the first dropdown menu, select BR
(Broker - External), CA
(Carrier), or IN
(Broker - Internal). The second dropdown menupopulates with entities
of the selected type. Select an entity
and click Add.
Each entity that you add displays in the Selected
list. To remove an item from the list, highlight it and click the
Delete
button to the left of the list or press
[Delete]
on your keyboard.
- The Client
criterion defaults to All.
To modify it, highlight Client
and click the Selected
radio button. Enter the account lookup
code, or click the lookup
button to locate
the account.
- Make a selection from the dropdown
list and click Add.
Each client that you add displays in the Selected
list. To remove an item from the list, highlight it and click the
Delete
button to the left of the list or press
[Delete]
on your keyboard.
- If binder
bill transactions are enabled in System
Settings, select the Binder
Transactions criterion and choose to Include
open binder transactions or Exclude
open binder transactions.
- In the
Statement section, enter
a Description
of the statement.
- Check
Automatically
flag items if you would like the system to flag all included
items for payment.
- Check
Create separate
statements per contract if you would like the system to generate
a separate statement for each commission payable entity/contract combination.
If you do not select this option, the system generates a single statement
for each commission payable entity.
- In the
Payment section, change the
Accounting month
and/or Description
if applicable.
- Click
Detail
to continue the workflow.
Note: If
a suspended statement already exists for the selected producer or
broker, organizational structure, contract, and line of business,
you are prompted, "Suspended statement(s) already exist. Do you
wish to continue working on the following statements?" Click
Yes to
open the existing suspended statement. Click No
to return to the Add Producer/Broker
Reconciliation screen and modify your criteria.
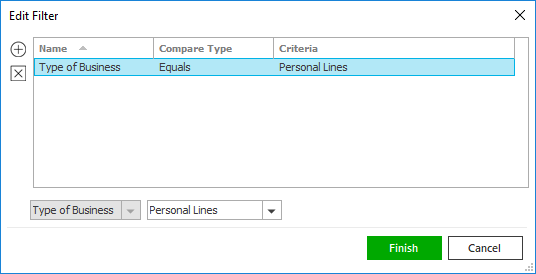
- The Transactions screen
displays. Use
the filter above the list to narrow the list of transactions if necessary.
- To record a full or partial payment for a transaction, select the
checkbox
next to the transaction and enter the Amount
to Pay.
- To perform further actions on a transaction, highlight the desired
item and
then click the appropriate button. To select multiple items at once,
click the Enable
Multi-Flag link. Then press and hold the [Ctrl]
or [Shift]
key while selecting the desired items in the list. To select items
individually by selecting their checkboxes instead, click the Disable Multi-Flag
link.
- If you need more information about a transaction, click the Transaction Detail
link label to view a summary of the transaction information or click
Access > Transactions
to enter the transaction detail.
Note: Your
newly added statement will display in the Producer
Broker Payable Reconciliations list only if it matches the criteria
for your current search filter. To change the statements that display
in the list, edit your Search where
options and click Find.
After creating the statement, you have access to the following actions:


 .
.