- Locate the
account in question and access the Client Contracts area.
- To access Accounts from the Home screen, do one of the following:
- Click Accounts on the navigation panel.
- Click Areas > Accounts on the menubar.
- Click the down arrow next to Home on the options bar and select Accounts.
- Click Locate on the options bar.
To access Accounts from another area of the program, do one of the following:
- Click Home > Accounts on the menubar.
- Click the down arrow next to Home on the options bar and select Accounts.
- Click Locate on the options bar.
- In the Locate account dropdown menu, select Client.
- In the Locate by dropdown menu, select the appropriate option.
- Select the suitable checkbox
or checkboxes to the right:
- Insureds
- Prospects
- Active
- Inactive
- Enter the first few letters of the name, lookup code, phone
number, etc. (depending on your Locate
by selection) and press [Enter]
or click Locate.
Note: Location by phone number searches all phone numbers associated with client and contact accounts (e.g., residential, mobile, fax). - The Results list displays all of the accounts that match the criteria you entered. Click on a column heading to sort the list by that category. For example, click the Last Name column heading to sort by last name in ascending order. To sort in descending order, click the Last Name column heading again.
- Highlight the desired item in the Results list.
- Click Client Contracts on the navigation panel, or click Areas > Client Contracts on the menubar.
- Click Services in the navigation panel.
- A list of services for the selected client displays.
Change the services
that display in the list if necessary.
- Click the word Services in the view filter.
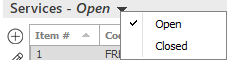
- A list of choices displays:
- Open
- Closed
Click on the appropriate selection.
 on the
  to associate a policy or line to the service you are adding.
 to select the service provider
from a list and click
to select the service provider
from a list and click  .
.