Add a Binder
A binder can be added to a policy only if the policy meets the following
criteria:
- The policy must be in contracted status. Binders cannot be added
to prospective policies.
- For each selected line, the Issue
Binders checkbox must be selected in the account detail for
that company.
- Locate the customer in question
and access the Proofs of Insurance area.
- Click Binders
under Proofs of Insurance
on the navigation panel.
Note: You
can access binders from the Policies
area by clicking Access
> Proofs > Binders > Open Binders or Closed Binders on the options bar or menubar.
- Do one of the following:
- Click the Add
button
 beside the list.
- Click New
on the options bar and select Proofs
> Binder.
- Click File
> New > Proofs > Binder on the menubar.
- Press [Insert]
on your keyboard.
- Press [Ctrl]+N.
- Enter a Description
of the binder.
- Optionally select the Include
history checkbox.
- Click on the line
of business to which to add the binder.
- If you want to add another line of business to the binder, select
the Include additional
lines checkbox.
Note: If
you select this checkbox, a window pops up when you click Detail
or Finish, prompting you
to choose additional lines of business.
- You can click Finish
or press [Enter]
to end the workflow at this point. However, it is advisable to click
Detail
and add the rest of the binder information at this time.
Click Cancel
or press [Esc]
to exit the workflow without adding a binder.
Click Detail
to add more information. (Continue to step 9.)
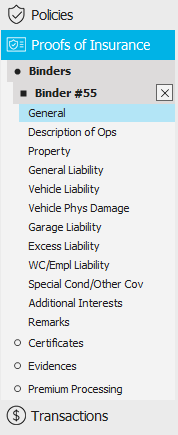
- The Binder Detail screen
displays. The navigation panel expands to show the available categories
for the selected policy. Click a category
to show its specific sections on the policy. Click a specific section to view
or fill in the information related to that section.
- A form displays on the right. View, add, or amend the field entries
as necessary.
- To view or revise information on these forms, select the correct
line in
the list. If there are no items in the list and the form is grayed
out, click the Add
button . The fields on the form are activated, allowing
you to fill in the information.
- Various tabs display below the list. Each tab contains different
fields. To view or revise information in these fields, select the
line in
the list. If there are no items in the list and the fields are grayed
out, click the Add
button . The fields on the form are activated, allowing
you to fill in the information.
To delete an item in the list, click the item
and then click the Delete
button or press [Delete]
on your keyboard. You are prompted to verify the deletion. Click Yes.
- When you have made the desired changes, do one of the following:
- Click Save
on the options bar.
- Click File
> Save on the menubar.