- Click the Add
button
 to the left of the list.
 - With focus on the list, press [Insert] on your keyboard.
- Press [Ctrl] + [N].
Optionally select Include inactive to include all vendor accounts, regardless of whether the accounts are active and whether they are designated as government entities. You can use this option to clean up old payables for government entity accounts that are no longer used.
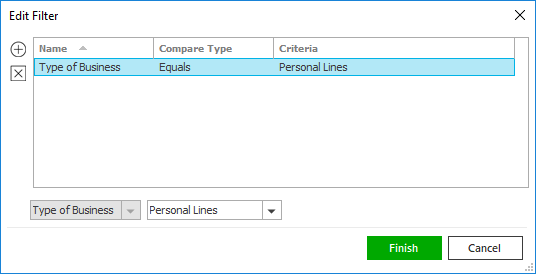
If you choose the Selected radio button, select an entity in the dropdown menu. Click Add. To add another government entity, repeat these steps.
Selected entities display in the list. To remove an entity from the list, highlight it and click the Delete button
 to the left of the list or press [Delete]
on your keyboard.
to the left of the list or press [Delete]
on your keyboard.- Select the desired criterion.
- In the Available frame, click the Selected radio button. Make a selection from the dropdown menu and click Add.
- Each item that you add displays in the Selected
list. To remove an item from the list, highlight it and click
the Delete
button or press [Delete]
on your keyboard.
Note: The only transaction codes available for selection for the Transaction Code criterion are those in the Government Tax and Government Fee classes.
- All: Do not filter by the receivable status.
- Partially paid: Include all taxes/fees with client payments applied against them, whether or not the receivable balance is $0.00.
- Fully paid: Include all taxes/fees with a receivable balance of $0.00 (i.e., all taxes/fees fully paid by the client).
- Unpaid: Include all taxes/fees with unpaid receivable balances.
Note: If you select Paid, the Payable Due column in Government Reconciliation Detail will display the amount due to the government based on the amounts applied within your selected Month/Date criteria for the statement. This amount will also default into the Amount to Pay column, but you can change the Amount to Pay if necessary.
Note: If a suspended statement already exists for the selected payable entity + state/province + agency + branch + department + profit center + transaction code + line of business, you are prompted, “Suspended statement(s) already exist. Do you wish to continue working on the following statements?” Click Yes to open the existing suspended statement, or No to modify your criteria selections.

 .
. 
- Select the level at which to attach the activity:
- Account
- Bill
- Claim
- Line
- Policy
- Transaction
- If you opt to attach to the Account, Claim, Line, or Policy, make the appropriate selection in the list. If you select Bill or Transaction, the Bill # or Item # for the selected transaction defaults.
- Click Continue. Add the activity as usual.