To learn more about this capability, click the Launch video button.
- From a screen in Accounts,
Configure, General Ledger, Procedures, Reports/Marketing,
or Utilities, do
one of the following:
- Click New > Sticky Note on the options bar.
- Click File > New > Sticky Note on the menubar.
- Press [F12] on your keyboard.
- Type the desired information on the sticky note that displays.
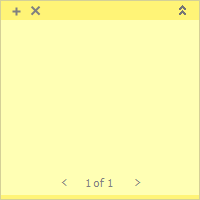
If the note is longer than the note area, a scroll bar displays.

Locate the existing sticky note and do one of the following:
Click New > Sticky Note on the options bar.
Click File > New > Sticky Note on the menubar.
Right click the sticky note and select New.
Click on the sticky note and press [Ctrl]+N on your keyboard.
Click the plus sign on the sticky note.
Type the desired information on the new sticky note that displays.
If the note is longer than the note area, a scroll bar is added.
To assign a high priority to a sticky note or remove a high priority from a sticky note, locate it and do one of the following:
- Right click the sticky note and click High Priority.
- With focus on the sticky note, press [Ctrl]+H.
Your agency may choose to color-code sticky notes. Locate the sticky note and do one of the following:
- Right click the sticky note, click Color, and select the desired color.
- With focus on the sticky note, press the key combination corresponding to the desired color:
- Yellow: [Ctrl]+1
- Pink: [Ctrl]+2
- Green: [Ctrl]+3
- Blue: [Ctrl]+4
- Purple: [Ctrl]+5
- Aqua: [Ctrl]+6
Right click the sticky note, click Opacity, and select the desired percentage:
- 20%
- 40%
- 60%
- 80%
- 100%
To edit a sticky note, locate and double click it.
If you right click a sticky note and select Edit, the following options are available:
- Spell Check
- Undo
- Cut
- Copy
- Paste
- Delete
- Select All
To hide or show a sticky note, do one of the following:
- Right click the sticky note and click Hide.
- Click the double arrow button in the top right corner.

To move a sticky note around the screen, click the top of it and drag.
To save a sticky note as an activity, do one of the following:
- Right click the sticky note and select Save as Activity.
- With focus on the sticky note, press [F9].
- The Add Activity window displays. In the Add to dropdown menu, select the item to which you want to add the activity:
- Account: Click to highlight the appropriate account.
- Bill: Enter the Bill #.
- Claim: Click to highlight the appropriate claim.
- Line: Select the Include history checkbox if you would like to add an activity for an item that is in History. Click to highlight the appropriate line of business.
- Policy: Select the Include history checkbox if you would like to add an activity for an item that is in History. Click to highlight the appropriate policy.
- Transaction: Enter the Transaction #.
- Click Continue.
- If necessary, select an activity Category to filter the activity codes available.
- Select an activity Code. If you selected a Category, the activity codes available are limited to those associated with that activity category.
- The priority defaults to Normal. You can change the priority to Low or Urgent if necessary.
- Indicate whether the Who/Owner is an Employee or Work Group, and then select an employee or work group from the dropdown menu.
- To add the activity to the Who/Owner's email calendar or email tasks, make the appropriate selection in the Update dropdown menu.
- Enter a Follow-up/Start date and time. Click the down arrow to the right of the date field to choose a date from the dropdown calendar.
- Optionally enter a Follow-up end date and time and a Reminder date and time.
- If they do not default, choose an Issuing company and Premium payable entity if applicable.
- The account name defaults in the Name
field. Click the lookup
button
 to select a different contact for
the selected account. You can also delete the account name
and type the new name in the field.
to select a different contact for
the selected account. You can also delete the account name
and type the new name in the field. - Select the appropriate contact method in the Contact Via dropdown menu. The choices are Email, Fax, Mail, and Phone.
- The activity's status is open by default. To close the
activity, do the following:
- Select the Closed radio button.
- Choose Successful or Unsuccessful in the Closed dropdown menu.
- Optionally enter an Actual time (in Hours and Minutes) that was spent on this activity.
- Optionally enter the Actual cost of this activity.
- Optionally enter a note in the text box.
- Choose the appropriate Access level.
- You can click Finish
or press [Enter]
to end the workflow at this point. However, it is advisable
to click Detail and add the rest of the activity information
at this time.
Click Detail to add more information. Continue to step 18.
Click Cancel or press [Esc] to exit the workflow without saving the information. You are prompted, "Do you wish to discard changes?" Click Yes. - The Activity Detail
screen displays. The fields at the top of the screen and on
the Detail tab reflect
the information entered when the activity was added. You can
update these fields if necessary.
The screen contains three tabs: - Detail
The Detail tab contains the following sections:
- Detail
The Detail section of the Detail tab contains the Follow-up Start date and time, End date and time, and Reminder date and time. You can revise this information if necessary.
The Issuing company, Premium Payable type (carrier, external broker, or internal broker), and Premium Payable account associated with the activity can also be changed if applicable.
- Who to Contact
In the Who to Contact section, you can change the person to contact in regards to the selected activity and specify how to contact them.
The Who to Contact frame populates based on the options your organization has configured. If necessary, you can manually update the contact: click the lookup button
 to open
the Who
to Contact pop-up
window, and then select a contact. To
narrow your lookup results, you can clear
the contact’s name, enter a new name in
the field, and click the lookup button
.
to open
the Who
to Contact pop-up
window, and then select a contact. To
narrow your lookup results, you can clear
the contact’s name, enter a new name in
the field, and click the lookup button
. - The Account
type and Lookup
code default from the account
associated to the activity. To
select a different account, select
an Account
type and click the Lookup
code button .
- Narrow
the list of contacts for the selected
account if necessary.
To narrow the list of contacts, use the Search where bar above the list.

The choices available in the second dropdown menu depend on the selection you make in the first dropdown menu.
- Equals: Enter the search criterion (e.g., the full name) in the field, or select the date from the dropdown calendar (if applicable). Click Find.
- Contains: Enter at least one character of the search criterion (e.g. part of the name) in the field. Click Find.
- All of the account’s contacts display in the list. Click a column header to sort by that column.
- Click a contact in the list to select it.
- Select a method of communication from the Contact at dropdown menu. The same phone number may be listed twice if the contact has the same number designated for phone and SMS.
- Click Finish to apply your contact Name and Contact Via selections to the activity.
Click Cancel to close the pop-up window without applying changes.
- The Account
type and Lookup
code default from the account
associated to the activity. To
select a different account, select
an Account
type and click the Lookup
code button
- The Contact Via method for the contact defaults, but you can change it if necessary:
- Select a contact method from the Contact Via dropdown menu. If the contact has an email address or a fax, phone, or SMS number saved, it populates in the field beside the Contact Via menu.
- If necessary, you can enter a different
email
address, fax
number or phone
number for this activity. Any
update you make only affects this
activity and does not save to the
contact.
Note: You cannot update the SMS phone number in this area, because SMS messaging requires an explicit opt-in from the contact. You can update SMS and other contact method information in Contact Detail.
- Notes
To add a note, click the Add button
 to the left of the Notes list.
Choose an Access level, type your note in the large text box, and click Finish or press [Enter].
- Detail
- Tasks
You can take the following actions on the Tasks tab:
- Add
a Task
- Do
one of the following:
- Click the
Add
button
 to the left
of the list.
to the left
of the list. - With focus on the list, press [Insert].
- Click the
Add
button
- Enter a Task description.
- Optionally select an Owner type.
- If you chose Specific Person as the Owner type, choose the Specific person.
- Change the Status if applicable.
- Optionally enter a Start date and time.
- Enter a Due date and time if applicable.
- If you are adding a task note, choose an Access level for the note.
- Type the note.
- Click
Finish
to complete the workflow and close the
Add Task window.
Click Add to add another task immediately.
Click Cancel to close the window without adding the task.
- Do
one of the following:
- Edit
a Task
- Click the task in the Tasks list.
- Click
the Edit
button
 to the left of the Tasks
list.
to the left of the Tasks
list. - You can change any field(s) in the Update Task window.
- Task
Notes
To add a note, click the Add button to the left of the list. In the Add a Note pop-up window, select an Access level for the note. Only employees with the selected access will be able to view the note.
Type the note in the box and click Finish.
- Add
a Task
- Further
Actions
This tab gives information on further actions that are associated with this activity.
- When you have made the desired changes, do one of the following:
- Click Save on the options bar.
- Click File > Save on the menubar.
- Press [Ctrl]+S.
- Right click the sticky note and click View Details.
- Select the Expires checkbox.
- Enter a date in the field provided, or choose a date in the dropdown calendar.
To scroll through the sticky notes on a screen, click the left arrow (<) and right arrow (>) buttons.
Do one of the following:
Right click the sticky note and click Edit > Spell Check.
With focus on the sticky note, press [F7].
Right click the sticky note and click View Details.