Change Your Real-Time Password
There are two ways to change passwords for carrier products within Real-Time:
Local Security Products
- From Home Base, click Clients and Files.
- Click the Real-Time button, select Real-Time Interface.
- From the Real-Time Interface screen, click File, Local Security Products.
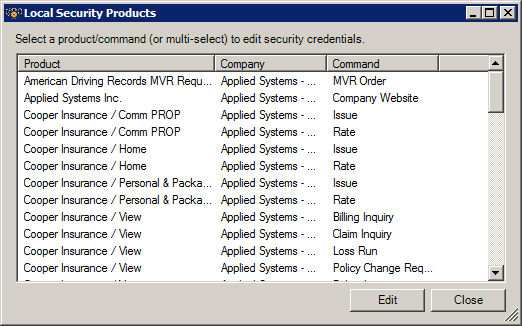
- The Local Security Products screen displays a list of all products configured for your system that utilize user-level security. Select a Product and click Edit.
- A call is made to the Real-Time server to edit credentials. Change your credentials on the screen that displays, and click OK.
- Repeat steps 4 and 5 for each product/command combination that requires a password change.
Online User Administration Site
- From Home Base, click Clients and Files.
- Click the Real-Time Interface button.
- From the Real-Time Interface screen, click File, Real Time Configuration. The Real-Time Configuration Utility screen displays.
- Click the link to the Online User Administration Site at the bottom of the Real-Time Configuration Utility screen.
- Log in as the administrator (WebDNAAdmin), unless you have been granted rights by the administrator under your own login.
Note: See the Enabling Individual Users for Access to the Online User Administration Site section, below.
- On the Web DNA Configuration screen, click Products, Enable Product Users.
- A list of products configured for the agency displays. Select the Product to be edited from the Products list, select the user name requiring a password change from the Users list, and click Edit.
Note: If the Same For All Commands option is selected, the entered password is saved for all commands under this particular product.
Enabling Individual Users for Access to the Online User Administration Site
- From Home Base, click Clients and Files.
- Click the Real-Time Interface button.
- From the Real-Time Interface screen, click File, Real Time Configuration. The Real-Time Configuration Utility screen displays.
- Click the link to the Online User Administration Site at the bottom of the Real-Time Configuration Utility screen.
- Log into the Online User Administration Site as the Administrator (WebDNAAdmin).
- Click User Setup, and then click the user name in the Users list.
- Select the Enable Login checkbox to allow this user individual access to the Online Admin site, enter a Login Password for this user, and click Save.
Note: If Administrator access is granted, this user would then able to edit credentials for users other than himself or herself. He or she would also have access to additional configurations for the agency.
