Add a Loss Notice
Use the following workflows to add a Loss Notice.
If you need to add a claim for a policy not in TAM, modify the current policy/billing screen to reflect expired policy period information. Follow the steps in Add a Loss Notice from the Claim List, and then modify current policy/billing screen to reflect information as it appeared prior to revising it.
Add a Loss Notice from the Claim List
- At Home Base, click Clients & Files.
- Select Customers from the dropdown menu above the list.
- In the list, select the customer for whom you are adding a loss notice and click the Claim List button.
- From the Claim List, select the claim.
- Click Options and select the type of claim (Property/Travel, Motor Car, Motor Theft, Public Liability, or Employers Liability).
- Click Yes to confirm that this is a new loss notice. If you are entering an automobile loss or property loss notice, you may be prompted to select a vehicle or location. Make the appropriate selection and click OK.
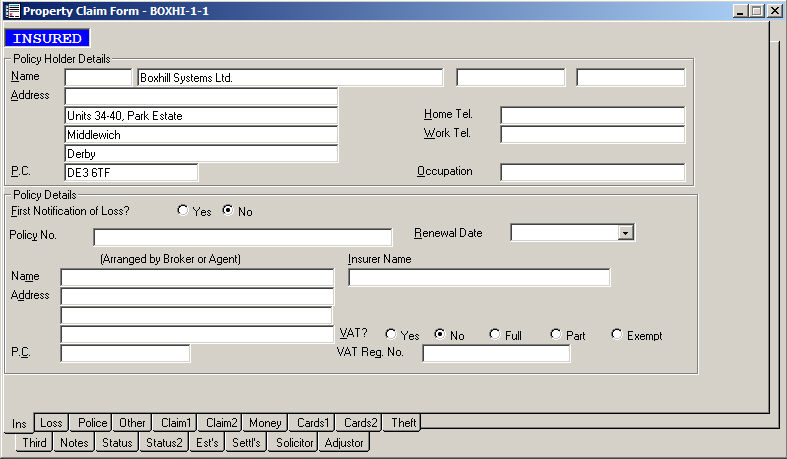
- Review and complete all sections of the loss notice by clicking the tabs on the bottom or using the [Page Up] and [Page Down] keys.
- Click File and Exit.
In addition to the Loss Notice, claimants must be added through the Add a Claimant workflow.
To send a letter related to a loss, see Create a Letter Pertaining to Loss.
Add a Loss Notice from a History Policy
- From the Customer List, select the applicable customer.
- Click the Policies button.
- On the Policy List screen, click the History tab.
- Select the policy associated with claim.
Note: Policies that display in red are expired.
- Click the Options button and select Add a Claim.
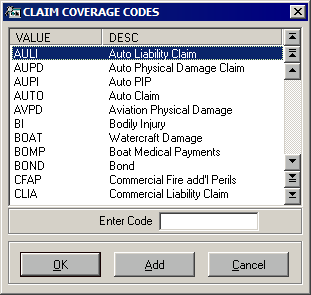
- Select the applicable claim code and click OK. The New Claim Detail screen displays.
- Enter or revise any relevant information on the Claim Detail screen in the fields provided and click OK.
- In the Risk field, enter the description of the item or individual involved in the claim. This information will not print on the Loss Notice.
- The information in the Description text box will default into the Loss Notice.
- Click Claims.
- From the Claim List, select the claim for which you are adding a loss notice.
- Click Options and select the type of claim (Property/Travel, Motor Car, Motor Theft, Public Liability, or Employers Liability).
- Click Yes to confirm that this is a new loss notice. If you are entering an automobile loss or property loss notice, you may be prompted to select a vehicle or location. Make the appropriate selection and click OK.
- Review and complete all sections of loss notice by clicking the tabs on right or using the [Page Down] key.
- Click File and Exit.
In addition to the Loss Notice, claimants must be added through the Add a Claimant workflow.
To send a letter related to a loss, see Create a Letter Pertaining to Loss.
Create a Letter Pertaining to Loss
Use the following steps to create a letter pertaining to a loss.
- Select the applicable claim from the Claim List.
- Click the Options button and select Workflows, Letters, Formletter.
- Select the applicable policy.
- Select the applicable formletter.
- Select an attachment category.
- Click OK. The formletter opens in Word, and the data merges. (It may take a few moments for the data to merge.) For further information, see The Word Integration Interface at the Client/File Level.