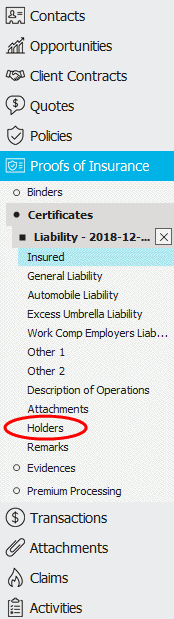
Add Holders to a Certificate
- Locate the
client in question and access
the Proofs of Insurance area.
- Click
Certificates
on the navigation panel.
Note: You
can access certificates from the Policies area by clicking Access
> Proofs > Certificate of Liability or Certificate of Property on the
options bar or menubar.
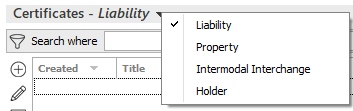
- A list
of certificates for the selected customer displays. Change
the certificates that display in the list if necessary.
- Click
on the appropriate certificate
in the list.
- Do one
of the following:
- Click
the Edit
button
 .
.
- Click
File >
Open on the menubar.
- Press
[Ctrl]+O.
- Double
click the certificate.
- The Certificate Detail
screen displays. The navigation panel expands to show the available
categories for the selected certificate. Click on Holders.
- Do one
of the following:
- Click
the Add
button
 to the left of the Holders list.
- With focus on the list, press
[Insert]
on your keyboard.
- The fields on the tabs below are enabled. The tabs on this screen
vary, depending on the certificate type:
- Do one of the following:
- Click Save
on the options bar.
- Click File
> Save on the menubar.
- To add a second holder, repeat steps 7-9.


 to the right of either field.
 ) to narrow
the list of contacts.
) to narrow
the list of contacts. 

 .
.