Add a Certificate
- Locate the
client in question and access
the Proofs of Insurance area.
- Click Certificates
on the navigation panel.
Note: You
can access certificates from the Policies area by clicking Access
> Proofs > Certificate of Liability Insurance or Certificate of Property Insurance
on the options bar or menubar.
- Do one of the following:
- Click the Add
button
 to the left of the list.
- On the options bar, click New
> Proofs > and either Certificate
of Liability or Certificate
of Property.
- On the menubar, click File
> New
> Proofs > and either Certificate
of Liability or Certificate
of Property.
- Press [Insert]
on your keyboard.
- Press [Ctrl]+N.
- The Add a Certificate
screen displays. In the Type
dropdown, choose the appropriate certificate type.
- Certificate of Liability
- Certificate of Property
- Enter a Description
of the certificate.
- You can click Finish
or press [Enter]
to end the workflow at this point. However, it is advisable to click
Detail
and add the rest of the certificate information at this time.
Click Cancel
or press [Esc]
to exit the workflow without adding the certificate.
Click Detail
to enter more information. (Continue to step 7.)
- The Certificate Detail
screen displays. The navigation panel expands to show the available
categories for the selected certificate. Click a category
to show its specific sections on the certificate. Click a specific
section
to view or fill in the information related to that section.

- A form displays on the right. To expand the list, click the splitter
 at the bottom of the list and drag the cursor
down the screen.
- Links to forms within the certificate display in the navigation
panel. In general, certificates include the following:
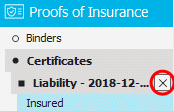
- To close the certificate, click the X
next to the certificate on the navigation panel. Your changes are
saved automatically.


 to the left of the list.
 at the bottom of the list and drag the cursor
down the screen.
 to the right of the
  ) to narrow
the list of contacts.

 .
.
