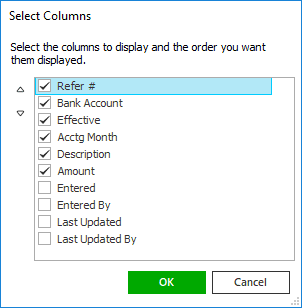
Add a Disbursement
- Access the
Disbursements area.
- Do one
of the following:
- Click
the Add
button
 to
the left of the Disbursements
list.
- Click
New >
Disbursement on the options bar.
- Click
File >
New > Disbursement on the menubar.
- Press
[Ctrl]+N.
- With focus on the list, press
[Insert]
on your keyboard.
- Select the appropriate bank
account.
- The Effective date defaults
to the system date but can be changed if necessary.
- The Accounting month defaults
to the default system month but can be changed if necessary. For instructions
on changing the default month, see Month-End.
- Select a Default
entry if applicable.
Note: If
you choose a default entry, some or all of the disbursement information
is filled in automatically.
- Enter
a Description
for the disbursement.
- In the Pay
to the Order of section, choose the entity Type.
- In the field to the right, enter the lookup
code.
To browse
for the account, click the lookup
button  to the right of the field.
Make
a selection in the Locate by
field, enter at least one character in the field the right and then click
Locate.
Select
the entity
in the list and click Finish
or press [Enter].
- The primary contact defaults into the Payee
field but can be changed if necessary. Type the new name in the Payee field
or click the lookup
button
 to the right of the field to choose a different contact associated
with the account, click the correct contact,
and then click Finish
or press [Enter].
Note: You must
have Edit Payee rights to change
this entry. See User
Configuration.
- The address for the selected contact defaults into the field but
can be changed if necessary. If you type a new name into the Contact field, you can update the
Address if necessary.
- If you need to print a check, select
the Print
checkbox. If you are merely entering the disbursement as a record,
enter the Check
number.
Note: You must deselect the Print
checkbox in order to enter a check number.
- If you are using Applied Epic to send
an Electronic Funds Transfer, select the EFT
checkbox and select a payment
method from the corresponding dropdown menu.
- If you
selected Print, the Include
check stub detail option is
selected by default. Deselect this checkbox if you want to print the
check only, with no supporting detail.
- Optionally
enter a Memo
and/or Remittance.
- In the Routing
field, optionally enter any information dictating where the check
should be sent (for example, if it should go to another employee before
being mailed to the payee).
- Use the Comments
field to type any additional information that you wish to print on
the check stub.
- Click
Continue.
- Select the Premium
checkbox (depending on the type of account you chose) if applicable
(i.e. if this is a return premium or advance premium disbursement).
If this disbursement is for a broker, you must select Return
or Advance from the dropdown
menu to the right; otherwise, this selection defaults according to
the account type. Follow the instructions below.
Client, Finance Company, or Other Interest
Broker
Company
Employee
Vendor

 to
the left of the Disbursements
list.
 to the right of the field.
 or press
 or
or  to change
its position.
 .
. to the left of the list to add another
item to this disbursement. Fill in the enabled fields. For
help with this, start again at step 19.
 or press