Access the Reconciliations area.
- To access the General Ledger from the Home screen, do one of the following:
- Click General Ledger on the navigation panel.
- Click Areas > General Ledger on the menubar.
- Click the down arrow next to Home on the options bar and select General Ledger.
To access the General Ledger from another area of the program, do one of the following:
- Click Home > General Ledger on the menubar.
- Click the down arrow next to Home on the options bar and select General Ledger.
- Click Reconciliations on the navigation panel or Areas > Reconciliations on the menubar.
Click Premium Payable under Reconciliations on the navigation panel.
The Premium Payable Reconciliations screen displays. Enter your desired search criteria to populate the list.
Click here for an explanation of reconciliation statuses.- Processing/Suspended/Finalized/Approved
- Processing: Flagging all items submits the job to the central server. Once all items have been flagged, the statement’s status is updated to Suspended.
- Suspended: Work in progress.
- Finalized: The statement is complete.
- Approved: The statement has been approved for payment. The statement's status is updated to Approved via the Approve for Payment action.
- Paid/Unpaid/Closed
- Paid: Paid via the General Ledger.
- Unpaid: Not yet paid via the General Ledger.
- Closed: This status replaces the Unpaid status for the selected reconciliation. The Close Without Paying action allows you to close a statement that will not be paid. Use this action only if your organization is cleaning up old payables or if the statement’s amount is 0.00. Using this action on a basic statement might result in an out-of-balance situation.
Re-Opened: When a statement has been re-opened, this indicator is always set. This is because once a statement is re-opened, it cannot be deleted. The Delete Statement option is allowed only for suspended statements that have not been re-opened.
To locate reconciliations that match specific criteria, use the search bar. Make a selection in each dropdown menu to locate the desired reconciliation. The fields vary, depending on the menu options you choose.

The choices available in the second dropdown menu vary, depending on the selection you made in the first dropdown.
- Equals: Enter the search criterion (e.g., the exact company code or user ID) in the field to the right, or select the correct date from the dropdown calendar (if applicable). Click Find.
- Contains: Enter at least one character of the criterion. Click Find.
- Within Range: Search between two calendar dates. Click the down arrow to the right of each field to choose dates from the dropdown calendars. Click Find.
- If you selected Contract Type, select Account Current, Company Statement, or Premium Payable from the second dropdown. Click Find.
- If you selected Created Area, select Receipts or Reconciliations from the second dropdown. Click Find.
- If you selected Paid Area, select None, Receipts, Disbursements, Vouchers, or Reconciliations from the second dropdown. Click Find.
- If you selected Paid Status, select Unpaid, Paid, Closed, or Reconciled from the second dropdown. Click Find.
- If you selected Adv or Rework, select Include, Exclude, or Only from the second dropdown. Click Find.
- If you selected Recreated, Reopened, or Reversed, select Include or Exclude from the second dropdown. Click Find.
- If you selected Statement Status, select Unpaid, Paid, Closed, or Reconciled from the second dropdown. Click Find.
To see the filter that is currently applied to the list, hover over the Search where text.
You can apply multiple filters if necessary.
- To apply multiple filters to the list, do one of the following:
- Click the Edit
Filter button
 .
. - Press [Ctrl] + E.
- The Edit
Filter pop-up window displays.
Note: You can also use the Edit Filter button, rather than the search bar, to apply a single filter to the list if you prefer.
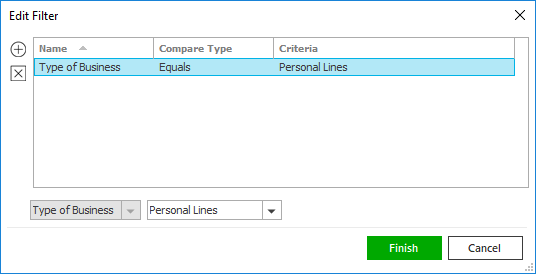
- Select and/or enter your desired search criteria using the dropdown menus and fields, and then click the Add button. The Name, Compare Type, and Criteria for your filter display in the list. Click one of these column headings to sort the list by that column. To reverse the sort order, click the column heading again.
- To apply additional filters, enter additional search criteria and continue clicking Add. To remove a filter from the list, select it and click the Delete button.
- Click Finish
when you have applied all of your desired filters.
To exit the dialog without applying any filters, click Cancel.
 to
the left of the list and fill in the fields below the list.
to
the left of the list and fill in the fields below the list.