Add a Broker
Note: This
article contains printing instructions that are only applicable if Applied
Epic is installed locally on your computer. If you access Epic through
a web browser such as Google Chrome, Mozilla Firefox, or Microsoft Edge,
you cannot print directly from within the system. See Printing
for more information about the printing capabilities available from Epic
Browser. All other steps in this article are applicable to both methods
of accessing Epic unless stated otherwise.
- Access the
Accounts area.
- Select Broker
in the Locate account dropdown
menu of the Account Locate
screen.
- Do one
of the following:
- Click
the Add
button
 next
to the list.
next
to the list.
- Click
New
on the options bar and select Broker.
- Click
File >
New > Broker on the menubar.
- With focus on the list, press
[Insert]
on your keyboard.
- Press
[Ctrl]+N.
- The Add
a Broker Account screen displays. Any applicable field
defaults set for the Broker
Add workflow populate. Setting field defaults streamlines the
workflow by lessening the amount of information you must enter each
time you add a new broker.
The Account section displays
the Account name and Lookup code. For information on
capitalization settings that may be applied to proper names automatically,
click here.
In the Business line, enter
a Prefix,
business Name,
and Suffix.
The Name field is outlined
in red to indicate that it is required.
Click
the Create Account
Name/Code button to generate an account name and code automatically.
Select
the Country of
operation from the dropdown menu.
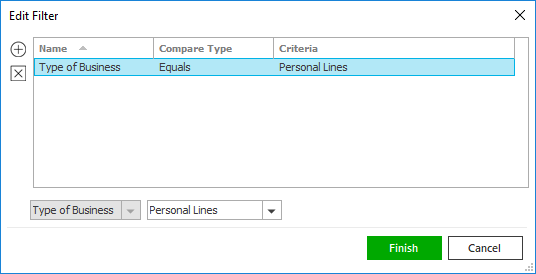
Select
the checkbox for each Type
of business that applies to the broker. Click the Select/Deselect All link label to toggle
all checkboxes. The selections limit the companies (issuing and billing)
available for selection on a policy to only the relevant options.
The broker will display in the Premium
Payable dropdown menu only for policies of the selected types
of business.
- Enter the Street, City,
and Province
in the highlighted fields that display.
- Enter the Postal
Code, or click the lookup
button
 to look up
the correct postal code.
to look up
the correct postal code.
- The Country defaults to
Canada.
- Optionally enter a Description
for the address or select a new Description
from the dropdown menu.
Note:
Typing a description in the field provided might not be an option, depending
on how your organization has set up address descriptions. See Contact
Description Configuration for more information.
- Enter a Site
ID for the address if applicable.
Note: Site IDs allow you to enter
specific address location numbers. This user-defined number is available
throughout the system for servicing, billing, and reporting purposes.
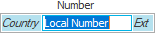
- In the Phone
Number section, tab to or click
in the Number field and enter the phone number.
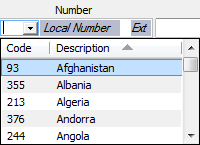
For international phone numbers, tab to or click in the Number field. Click on Country to access the dropdown menu and select
the correct country in the list.
Enter the remainder of the phone number in
the field.
Note: See Telephone Country
Codes Configuration for instructions on adding, editing, or removing
a country code.
- If applicable, click in or tab to the Ext field and enter the extension.
- Optionally enter a Description
of the phone number (e.g. Home
or Cell)
- Repeat
steps 11 - 13 to enter a Fax
number.
- Enter the address of the broker's Website.
Note: To view the broker's website from this screen, click the
Internet
button  to the right of the
Website field. The website
opens in your web browser.
to the right of the
Website field. The website
opens in your web browser.
- Enter details for the Primary
Contact. This creates an Individual contact. If you do not
enter these details, the system creates a Business
contact using the Account information above.
- You can assign Structure
information to the account. Click the Selected
radio button and choose the Agency,
Branch,
Department,
and Profit
Center
to which this account belongs. Only users with access to that structure
can see the account.
- Optionally add Comments.
- You can click Finish
or press [Enter]
to end the workflow at this point. However, it is advisable to click
Detail and add the rest of
the broker information at this time.
Click Cancel
or press [Esc]
to exit the workflow without saving the information. You are prompted,
"Do you wish to discard changes?" Click Yes.
Click Detail
to fill in more information. (Continue to step 17.)
If you click Finish or Detail, the system checks to ensure
that a similar account does not already exist in the system. If this
check finds a similar or duplicate account, it warns you. See Duplicate
Accounts Search for more information.
- The Broker Detail screen
displays. The screen contains the following tabs:
- When you have made the desired changes, do one of the following:
- Click Save on
the options bar.
- Click File
> Save on the menubar.

 next to
the list.
next to
the list. next to
the list.
next to
the list. to the left of the
  to the
left of the list.
to the
left of the list. .
.
 .
. 
 button or press