Using Marketing Reports to Send Mass Emails
You can send mass emails that contain personalized information for each
recipient by generating a report with marketing options. The following
reports have this option:
- Account Lists (all types)
- Contact List
- Policy List
- "With This, Not That" (Policy)
This functionality is only available in the Reports/Marketing area.
Before generating the report, ensure that you have created a template
for the marketing email in Attachment
Template Configuration.
Note: The
information in this article only pertains to merging data into an email
using the Generate Letter option
in the Marketing Options. For
more information on using the other Marketing
Options, see Create a New
Report, Edit a Report, and/or Launch
a Marketing Campaign.
Note: This
article contains printing instructions that are only applicable if Applied
Epic is installed locally on your computer. If you access Epic through
a web browser such as Google Chrome, Mozilla Firefox, or Microsoft Edge,
you cannot print directly from within the system. See Printing
for more information about the printing capabilities available from Epic
Browser. All other steps in this article are applicable to both methods
of accessing Epic unless stated otherwise.
- Access the
Reports/Marketing area.
- The My Reports list defaults
when the Reports/Marketing
screen opens. If the report is in a different list, click the button for that
list on the navigation panel or click on My Reports
in the view filter and make a different selection.
- Click to highlight the report.
- Do one of the following:
- Click the Edit
button
 .
.
- Double click the report.
- The Criteria screen displays.
Click on a criterion
to change the specific items for the report. For example, click on
Agency to select
the agencies to include/exclude in the report.
- Click the Include
Selections or Exclude
Selections radio button to specify whether the items in the
Selected list are to be included
or excluded in the report.
- The fields and/or lists on the right vary, depending
on your criterion selection in the main list:
- Each report includes a special criterion called Parameter
Page. When you include it, the first page of the report lists
all of the criteria you used to generate the report, so you can refer
to them later. If you do not want a parameter page, select the Parameter Page
criterion and click the Exclude
Parameter Page radio button.
- Include
additional criteria if desired.
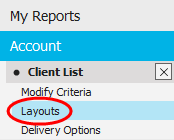
- Optionally click Layouts
on the navigation panel to change the report layout.
- Click to highlight a layout
in the list. Instead of using a saved layout, you can also opt to
create a new layout or edit an
existing layout.
Note: To
delete a layout in the list, select the layout
and click the Delete
button. You are prompted, "Do you wish to delete this record?"
Click Yes.
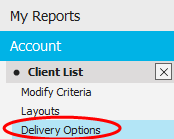
- Click Delivery
Options on the navigation panel.
- Specify where (or to whom) to send the report. Current
User, meaning the person who is running the report, is automatically
included as a recipient. You can do the following here:
- Enter a subject
and message
in the Email/Fax Detail section.
The Subject field is required.
Use the formatting ribbon to format text and add images if necessary.
Hover over each button to display its function in a tooltip.
- Select a From
email address in the dropdown menu, or click the Change Sender
link label in the Email/Fax Options
section. If you want to use a customized
email signature, select it from the Signature
dropdown menu. Click the Refresh
link label to reset the signature to the default (or to clear the
field if no default signature is defined).
- In the Scheduling
section, opt to run the report now, or schedule it to run later.
If you choose Schedule,
enter a date
(or choose a date
from the dropdown calendar) and time
for the report to run. Select a Recurrence
option.
If you choose anything but One Time Only, the report
runs automatically at the time indicated in this section. Consider setting
up longer reports to run after business hours.
- In the Marketing Options
section, select the Generate
letter checkbox, then click the lookup
button
 to open the Available
Templates window.
to open the Available
Templates window.
- Choose a Template
folder if applicable, and click to highlight the desired
template
in the list. See Attachment
Template Configuration for instructions on creating templates.
- In the Marketing Distribution
section, select Generate
as email as the distribution method.
- Choose Text
in the Insert into email as
dropdown menu.
- Select the Attach
email to account checkbox to save the email to each recipient’s
Attachments list.
- Choose a From
email address.
- Enter a Subject
line for the email. You can also use variables to insert information
into the Subject:
- Place the cursor where you want the data to display in
the Subject line.
- Click the lookup
button to open the Available
Description Variables window.
- Select a variable
in the list. The Description
column explains each variable’s output. You can only select
one variable at a time.
- Click Finish
to insert the variable.
- Repeat this process to insert additional variables.
- Do not enter a message. The body of the email populates with
the selected email template.
- Click Finish
to apply your selections, or click Cancel
to discard your selections and close the Available
Templates window.
- Select the Attach
copy to account checkbox to save a copy of this letter in the
selected clients’ Attachments
lists.
- To use a template to send a mass email
based on your report criteria, select the Send
email template checkbox, then click the lookup
button to open the Select
email template pop-up window. Before sending the email, you
may want to add the Record
Listing criterion to your report from the Modify Criteria screen to ensure
that the report does not send duplicate emails. For example, the Policy List report might send multiple
emails to a contact with multiple policies that meet your criteria.
- The From field defaults
based on your selection in the Email/Fax
Options frame on the Delivery
Options screen, but you can click the Change
Sender link label to select a different option if necessary.
- Select a Template
from the dropdown.
- The Branding
profile and Signature
default based on your template selection, but you can choose a
different branding profile or signature if necessary.
- The Subject
line defaults based on your template selection, but you can edit
it if necessary.
- The Message
defaults based on your template selection, but you can edit it
if necessary. Use the formatting
ribbon to apply styling.
Note: If
the message contains merge variables, they do not populate with
client/prospect information in the preview. The variables will
populate with each email recipient’s information when you
run the report.
- If you make changes to the Message
and want to revert to the original Template,
Branding, or Signature,
click the Refresh
link label beside the option you want to reset.
- Click Finish
to save your changes and close the Select
Email Template pop-up window.
Click Cancel
to discard your selections without saving.
- Optionally select the Preview/Edit results before processing
checkbox. If you select this checkbox, you must launch
the marketing campaign from the Marketing area after you generate
the report.
Note:
The preview option is not available if the campaign is scheduled (step
16).
- Select a radio
button in the Marketing
Distribution Contact section to distribute to the corresponding
contacts on each account returned in the report:
- Select the Use
primary contact radio button to distribute the report to
each account’s primary contact.
- Select the Use
specified contact classification radio
button to distribute the report to the contacts on each account
with a particular classification.
- Click Actions
> Generate Report on the options bar or the menubar. The
email sends to the selected recipients and the contacts that match
your selections from the previous step.
 to the left
of the list to open the
to the left
of the list to open the  to return to the previous
folder.
to return to the previous
folder. , or press
  beside the
  .
.