 Minimize Button
Before working in Applied Rating Services, familiarize yourself with some of the basic functions. These functions enable you to accomplish various program tasks.
This section describes the following elements and functions:
Minimize ButtonThe Minimize button is located in the upper right corner of the window. Click this button to reduce the size of the current window to its task bar button, which takes up the smallest amount of screen space.
 Maximize Button
The Maximize button is located in the upper right corner of the window. Click this button to restore the window to 100% size, which takes up your entire screen. After a window is maximized, this button changes to the Restore button.
Note: You may not be able to resize some screens in Applied Rating Services.
 Restore Button
The Restore button is located in the upper right corner of the window. Click this button to return the window from its maximized size. After a window is restored, this button changes to the Maximize button.
 Close Button
The Close button is located in the upper right corner of the window. Click this button to close the active window.
 Help Button
The Help button is located in the upper right corner of the window. Click this button to open the Applied Rating Services Help File.
Note: When clicking the help file button the help file will open to the article for the screen that the help file was launched from.

The menubar is located in the upper left corner of the window, just below the title bar. Click an option on the menubar to display a list of functions, also known as a menu.

The options bar is located below the menubar. Click these buttons to quickly access the functions available through the menus on the menubar. Options bar buttons are disabled, or grayed out, when a function is not available for that part of the program.
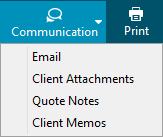
An arrow displays to the right of some of the buttons on the options bar, which indicates the button has multiple actions associated within it. To select an action associated with a button, click directly on the button and choose the appropriate item from the dropdown menu that displays.
The task bar is located on the bottom of the screen: a task bar button displays for each program or window currently open.
Hover over an Applied Rating Services task bar button to see the screens that are currently in use for that area of the program. Click on a thumbnail of a screen to open it.
Lists show existing items for the area in question. Click the Add button  to
the left of the list to add an item. You can edit, delete, and perform
other actions on items in the list, depending on the program area.
to
the left of the list to add an item. You can edit, delete, and perform
other actions on items in the list, depending on the program area.
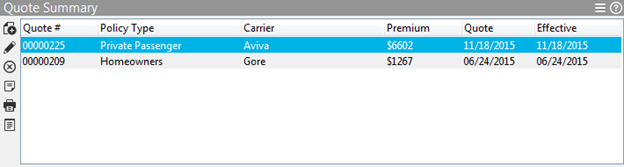
The column order of some lists can be changed. To sort columns, click and drag the column to the desired location.
Note: For some lists, you can change the order in which items display by clicking the column heading for the category you wish to use to sort them. Click the column heading again to toggle between ascending and descending order.
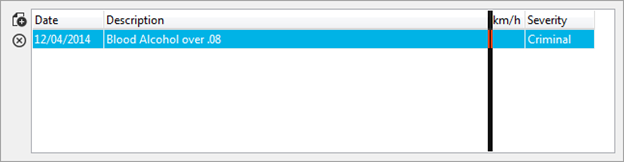
The following buttons can be found to the left of the lists.
Add
 Edit/View
 Delete
 Memos/Notes
 Print
Print
 Application
 Attachments
 Export to Broker Management System/Applied Epic/Applied TAM (only
displays if your broker management supports integration)
Export to Broker Management System/Applied Epic/Applied TAM (only
displays if your broker management supports integration)
Note: Not all options are available for every list.
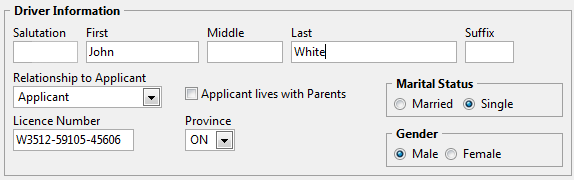
Frames group related controls or related information in an area on the screen.
Help buttons  are located in the
right corner on the title bar of the frame. Clicking the Help
button for that frame will launch the Applied Rating Services Help File
and the help file article for that frame opens.
are located in the
right corner on the title bar of the frame. Clicking the Help
button for that frame will launch the Applied Rating Services Help File
and the help file article for that frame opens.
Tabs allow you to access related fields of information.

Fields are boxes in which you can type information.

Required fields are filled in red. The fields will only show filled in red when the required fields are left blank when trying to process the quote.

Some buttons in Applied Rating Services have icons to indicate if data has been entered in for that section. .
|
A green circle with a checkmark indicates there are no issues with the information entered, or that the user has reviewed the information. |
|
A grey circle indicates no information has been entered. |
|
A red circle with an X indicates a problem with the information entered. |
Click in a checkbox to select  or
deselect
or
deselect  the option to the right of the checkbox.
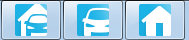
Click in a radio button to select the option to its right. Only one radio button per group of options can be selected.

Click the down arrow button next to a field to display a dropdown menu (or dropdown calendar for date fields). The dropdown menu is sometimes referred to as a dropdown box or dropdown list, or dropdown.
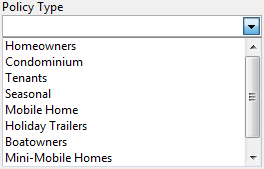
To jump to a specific item in the list, click the down arrow to the right of the list, and enter at least the first letter of the desired selection in the field.
Note that dropdown menus outlined in red are required fields.
Click the Calendar
button  in the date field to display the calendar
pop-up window.
in the date field to display the calendar
pop-up window.
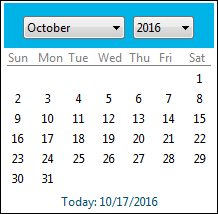
Use the dropdowns at the top of the calendar to select a month and/or year. Click the selected date on the calendar.
The pop-up calendar defaults to today’s date, which displays at the bottom of the pop-up calendar.
Many of the printing workflows involve the Document Centre print screen.
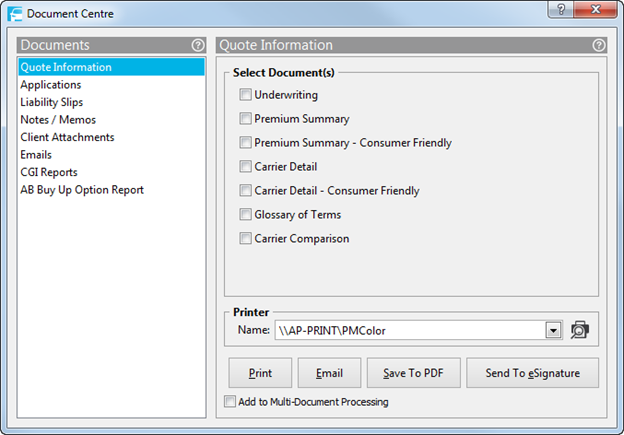
You can print from the Document Centre screen by doing the following:
 to
view the document(s) before printing.
to
view the document(s) before printing.To learn more, see the Document Centre and Printing From Document Centre articles.
The following Help options can be found throughout the system by clicking Help on the menubar and selecting the option from the dropdown menu.
Use the Report Underwriting Defect to Applied option if you are notice any underwriting discrepancies, such as incorrect generated discounts or surcharges. Once the option is selected, enter your Email address and Description of the error, and click OK. The problem will be reported to Rating Services Support, who will call you back or reply to you by email.
Note: If you have any technical difficulties, please call 1-800-617-4666.
Use the Remote Assistance option if you need assistance with Applied Rating Services. This option connects you with an Applied Support Technician via WebEx who will provide technical assistance.
Once the option is selected, your installed web browser is launched and the WebEx page displays. To connect with an Applied Support Technician in a WebEx session. enter the host’s room ID and click the Join button.
Use the Request Applied Support option to create a case for your issue/question or use the Applied Online Chat to talk to an Applied Support person about your issue/question.
Once the option is selected your installed web browser is launched and Applied Community My Cases page opens. From here you can create a case for your issue/question by clicking the Create New Case button and entering the details of the issue/question. Alternatively, you can click the Chat with Us button at the bottom of the page to chat with an Applied Support person.
Use the Online Service Status option to view Applied Rating Services current system status and to report an issue to Applied Support if it is not listed on the webpage.
Once the option is selected your installed web browser is launched and the Applied Rating Services Network Status webpage displays. If reporting an issue click on the Report It link or contact Support by phone, e-mail or by chat.
Use the About option to view information regarding your Applied Rating Services system. The About screen also displays contact information for Applied with Phone, Email and Website information.


