Add a Payment Transaction
Payment transactions are used to record payments received or to schedule
advance payments. The workflow for entering payment transactions differs
significantly from that for entering invoice (billing) transactions.
In order to enter payment transactions, you must ensure that payment
transaction codes have been installed for your system in Transaction
Code Configuration. Only transaction codes with a Class
of Payment – Create Transmission File
or Payment – No Transmission File
are available for selection when adding payment transactions. If you are
entering payments using an installment plan, you also need to ensure that
an installment plan in your system has been designated as Payment.
See Installment
Plan Configuration.
If you are entering payments for a policy or line, it is recommended
that you bill the policy first by adding
an invoice transaction. When you finish entering the payment transaction,
you will be prompted to apply credits to debits, enabling you to clean
up receivables for the account.
- Locate the
account in question and access the Transactions area.
- Do one of the following:
- Click the Add
button
 on the Transactions screen.
- Click New
on the options bar and select Transaction.
- Click File
> New
> Transaction
on the menubar.
- Press [Insert]
on your keyboard.
- Press [Ctrl]
+ N.
- In the Add Transaction
section, select a radio button to indicate whether this is a Policy, Line, Account, or
Service
transaction.
If you select the Policy or
Line radio button, check
the Include History
checkbox if you want to show history policies in the list.
Ensure that the correct Service Summary
is selected as well.
- In the Invoice/Payment
frame, select Payment.
- In the Transaction area,
select one of the following:
- Click Continue
or press [Enter]
to enter the transaction.
Click Cancel
or press [Esc]
to cancel the transaction.
- Transaction detail displays. In the Detail
frame, the following dates default but can be modified:
- Payment date: Effective
(due) date for the payment (e.g. the date on a check or the date
that the payment is to be transmitted to the financial institution).
If this is an installment transaction, the payment date advances
incrementally for each installment.
- Payment received: Date
the payment was/will be received (e.g. the date the check is received
by the organization or the date that the funds are deposited electronically).
If this is an installment transaction, the payment received date
advances incrementally for each installment.
- Accounting month: Month
for which the payment will impact the General Ledger at Month-End.
Defaults to the same month as the Payment
date. If this is an installment
transaction, the accounting month for each installment defaults
to match the installment’s Payment
date.
- Production month: Defaults
the same as the Accounting month.
If this is an installment transaction, the production month for
each installment is the same.
- Select a payment Method.
- Enter a Payment
ID (e.g., a check number).
- In the Payment Information
frame, use the Type
dropdown to specify whether the payments are received from a Client, Broker,
or Other Interest.
- Select the Account
and Contact.
- Select a Payment
option. Cash/Check
is always available. You may also select a payment method that has
been installed for the selected contact in contact
detail.
The Description of the selected
payment method and the Name on account
display.
- If you are adding an installment transaction, click Continue to view
the installment summary. Otherwise, continue to
step 14.
- Click Finish
or press [Enter]
to complete the workflow.
Click Add
to complete the workflow and add a second transaction for the selected
client.
Click Cancel
or press [Esc]
to exit the workflow without saving the information. You are prompted,
“Do you wish to discard changes?” Click Yes.
Because this is a credit transaction, you may be prompted, “Do you wish
to apply credits to debits?” Click Yes
to use the Apply Credits to
Debits workflow to apply the payment to an existing invoice transaction.
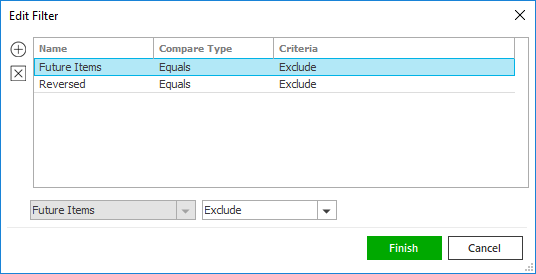
Note: If
the transaction you have just added does not display in the list when
you return to the Transactions
screen after completing the workflow, or after you refresh the list or
re-enter it from another area, edit
your search criteria to include the newly added transaction.
 on the Transactions screen.
 ) to narrow the list of transactions.


