- Access the Reports/Marketing area.
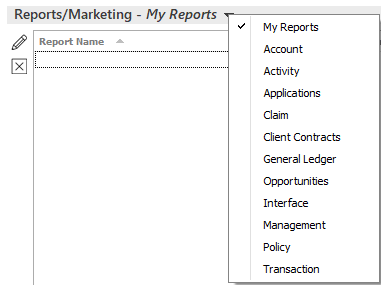
- The My Reports list defaults when the Reports/Marketing screen opens. If the report is in a different list, click on My Reports in the view filter and make a different selection.

These are the options:
- Account
- Activity
- Applications
- Claim
- Client Contracts
- General Ledger
- Interface
- Management
- Opportunities
- Policy
- Transaction
- Click to highlight the existing report.
- Do one of the following:
- Click the Edit
button
 .
. - Double click the report.
- Click the Edit
button
- The Criteria screen displays. Click on a criterion to change specific items for the report. For example, click on Agency to select the agencies to include/exclude in the report.
- Click the Include Selections or Exclude Selections radio button to specify whether the items in the Selected list are to be included or excluded in the report.
- There are different fields and/or lists on the right, depending on your criterion selection in the main list:
- Each report includes a special criterion called Parameter Page. When you include it, the first page of the report lists all of the criteria you used to generate the report so you can refer to them later. If you do not want a parameter page, select the Parameter Page criterion and click the Exclude Parameter Page radio button.
- Include additional criteria if desired.
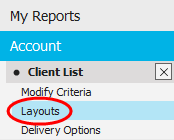
- Optionally click Layouts on the navigation panel if you want to change the report layout.

- Click to highlight a layout
in the list. Instead of using a saved layout, you can also opt
to create a new layout or
edit an existing layout.
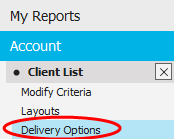
Note: To delete a layout in the list, click on the layout and click the Delete button. You are prompted, "Do you wish to delete this record? Click Yes. - Click Delivery Options on the navigation panel.

- Specify
where (or to whom) the report is to be sent. Current
User, meaning the person who is running the report, is
a report recipient automatically. You can do the following here:
You can also save an electronic copy of the report.
- If
any of the report recipients are to receive the report via email
or fax, enter a Subject
and Message
for the fax and/or email in the Email/Fax
Detail section.
Note: The Subject field is required. - If
any of the recipients will be receiving the report via fax, select
a Cover page
in the dropdown menu. To change the Language
of the selected Cover page,
select it from the Language
dropdown menu.
Note: You must set up a Cover page in all desired languages in Fax Cover Page Configuration to make these languages available for selection from this dropdown menu.
To see
a preview of the fax cover page, click the Preview link to the right of the field.
To change the name that prints on the fax as the sender, click the
Change
Sender link. In the Change Sender pop-up window, select a Name
from the dropdown menu. Optionally add a Fax
number with Ext,
Phone
number with Ext,
and Email
address to print on the fax.
Click Finish.
- In the Scheduling
section, opt to run the report Now,
or Schedule
the report to run later.
If you choose Schedule, enter a date (or choose a date from the dropdown calendar) and time for the report to run. Select a Recurrence option:
- One Time Only
- Every Weekday (M-F)
- Daily
- Weekly
- Monthly
- Quarterly
- First Day of the Month
- Last Day of the Month
If you choose anything but One Time Only, the report runs automatically at the chosen interval. The report runs at the time indicated in this section. Consider setting up lengthier reports to run after business hours.
- To launch a marketing campaign based on information from
this report, choose the appropriate checkbox
in the Marketing Options
section. If you intend to generate letters, use an email
template, add activities to accounts, or send text messages based
on the report results, you must set up a new email
template, letter
template, activity
category, and/or SMS
message template before configuring marketing options. The
templates are used for the emails, letters, or text messages sent
through the campaign; the activity category helps you track the
campaign's effectiveness.
- Generate Letter: Generate a letter for each account that displays in the report.
- Send email template: Use an email template to send a mass email based on your report criteria. Before sending the email, you may want to add the Record Listing criterion to your report from the Modify Criteria screen to ensure that the report does not send duplicate emails. For example, the Policy List report might send multiple emails to a contact with multiple policies that meet your criteria.
- Add Activity: Add an activity for each account that displays in the report.
- Add Sticky Note
- Send SMS (enabled only for reports used to market to clients)
- Select the Preview/Edit
results before processing checkbox if you want
to market only to some of the clients who meet the selected
criteria. Previewing the results is recommended if you are
sending SMS messages for this campaign, as you will be charged
for each message sent.t.
Note: The preview option is not available if the campaign is scheduled (step 16). - Select the Include "Do Not Market" checkbox if applicable.
- If you selected the Generate Letter, Add activity, Add sticky note, or Send SMS checkbox(es) in Marketing Options, you can select a Marketing Distribution Contact for all marketing campaign-enabled reports (except the Contact List and Employee List reports):
- Select the Use primary contact radio button to distribute the report to each account’s primary contact.
- Select the Use specified contact classification radio button to distribute the report to the contacts on each account with a specific classification.
Please note that your selected Marketing Option(s) behave differently if you select a Contact Classification in the Marketing Distribution Contact frame:
- Generate letter: A letter generates for each contact with the selected classification. Letters distribute based on each contact’s Marketing dropdown menu selection in the Preferred Contact Methods frame of Contact detail. To add a copy of the letter to the account to which the contact is associated, select the Attach copy to account checkbox to. If delivery to the contact fails, the corresponding account displays on the Marketing Distribution Log.
- Add activity: An activity generates for each contact. No activities generate if no contacts on the account have the classification.
- Add sticky note: One sticky note generates per account. No sticky notes generate if no contacts on the account have the classification.
- Send SMS:
A conversational text message is sent to each contact
with the selected classification. The SMS message
distributes based on the contact method on file for
each contact and saves on each contact’s account.
If the text message fails to send, the corresponding
account(s) display on the Marketing
Distribution Log. Standard messaging rates
may apply.
Note: SMS messages are only sent to contacts with a valid phone number who have the corresponding SMS options selected in Contact detail.
- Do one of the following:
- Click Actions > Generate Report on the options bar.
- Click Actions > Generate Report on the menubar.
If you did not select the Preview/Edit results before processing option, your marketing campaign launches now.
If you did select the Preview/Edit results before processing option, you must launch the marketing campaign from the Marketing area in order to generate the appropriate letters, activities, etc.
- When you exit the screen, you
are prompted, 'Do you want to save changes?'
Click Yes to save the changes you made to the selected report.
Click No if you do not want to save the changes you made to the selected report.
Click Cancel to remain on the Delivery Options screen.
 or
or  .
. .
. .
. to the
left of the list to open the
  to return
to the previous folder.
 .
. to the right of the
  to the right of the
  .
.
 .
.