Add a Master Marketing Submission
A
Master Marketing Submission serves as a template for the individual carrier
submissions you submit to market one or more lines of business.
When
you market a policy, you will usually complete the following workflows
in this order:
- Add a Master Marketing Submission
- Create a Carrier Submission
- Submit to Carriers
- Create a Carrier Response
- Update Stage to Entered
- Update Carrier Submission OR
Move Marketed Lines to Current Policies
You must
add a master marketing submission before you can complete any other steps
to market a policy.
- Locate the
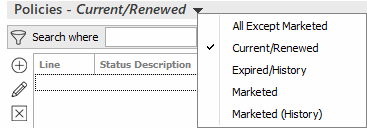
account in question and access the Policies area .
- Click the word "Policies" in the view filter and select
Marketed.
- Do one of the following:
- Click the Add
button
 to the left of the Marketing Submission mu.
- Click New
> Master Marketing Submission on the options bar.
- Click File
> New > Master Marketing Submission on the menubar.
- The Add a Master Marketing Submission
screen displays.
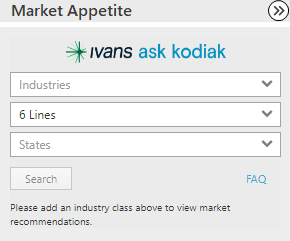
A Market Appetite sidebar
displays on the right hand side of the screen if you are adding a
master marketing submission for a client whom the system recognizes
as a commercial lines client. Perform a Market
Appetite search in this sidebar to locate carriers
with appetite for this client’s commercial risk who might be interested
in writing this policy. Market Appetite integrates with Ask Kodiak
to provide you with current, accurate appetite information supplied
by each carrier.
- Enter a Name
for the marketing submission.
- Optionally enter the desired Effective
and Expiration
dates.
- Select an Agency.
- Select a Branch.
- Select a Department.
- Choose a Type
of business.
- Click the Add
button in the Policies
to Market section. In the Add
Line pop-up window, select the appropriate radio button, and
then click Continue.
- Add new line
- Choose the correct Line
of business.
- Select the Profit
Center and
Line Status.
- The Issuing Location
defaults based on the client’s mailing address if it is set
up do so in Policy
Type Configuration or Field
Default Configuration. Otherwise, it defaults blank. Update
it if necessary. This field is required.
- Select a Prefill
if applicable.
- Click Add
to add another line of business, or click Finish
if there are no more lines to add.
- Add existing line
- In the Existing
Policies to Market window, select the checkbox next to each policy to
be marketed.
Note:
Select the Include
history checkbox to include history policies in the
list.
- Click Finish.
- Click to highlight a line of business
in the list and update its Status
and Profit
Center. Repeat this process for each line of business
or click the Apply
to All Lines link label to apply the status and profit
center to other lines of business.
- Click Detail
to enter information for the policies to be marketed.
If you are combining
lines of business from two separate policies, the Update
Location/Building Numbers pop-up window displays a list of
locations and buildings associated with the client. You must assign
a new location number and building number to each policy.
- To use the existing location and building numbers, click the
Default Loc/Bldg
# link label.
- Click to highlight the appropriate policy
in the list. Enter the new numbers in the New
Loc# and/or New
bldg # fields and click Update.
Repeat this for each item in the list.
- To assign a location and building number to more than one item
in the list, press [Ctrl]
as you click on the selected locations,
enter the New
Loc# and/or New
bldg #, and click Update.
- Click Finish
or press [Enter]
on your keyboard.
Note: If
you added multiple, existing policies to the master marketing submission,
a message displays: "Multiple … applications were merged. Please
verify duplicate information does not exist." Click OK.
- Submission Detail displays.
The navigation panel expands to show the policies that you are marketing,
and the available categories for the selected policy.
- Submission detail displays. The Name
of the master marketing submission displays but can be changed.
- Optionally enter or amend the Effective
and Expiration
dates.
- Select a Source
if desired.
- The screen contains two main tabs:
Click a policy
to view its detail.
Click a specific section
to view or fill in the related information.
- If you click a section for
which you defined
a prefill, you can apply that prefill to the application. If you
have prefills that include standard coverages for a Business Auto
policy, for example, you can go to the Business Auto application and
apply the prefill. Click Actions
> Select
Prefill to apply a prefill. See Select
Prefill for more information.
For a policy/plan detail form, apply a prefill by clicking on
the Application
Detail section and then clicking the Select Prefill button. The button
only displays if prefills
are defined for the form. See Policy/Plan
Data Capture Forms for more information.
- A form displays on the right. View, add, or amend the fields as
necessary.
A list
at the top of many of the forms. To expand the list, click the bottom
of the list and drag the cursor down the screen.

To view
or revise information on these forms, select the correct line in the list. If there are no items
in the list and the form is grayed out, click the Add
button  to activate
the fields on the form so you can fill in the information.
to activate
the fields on the form so you can fill in the information.
Various
tabs display below the list. Each tab contains different fields. To view
or revise information in these fields, select the correct line in the list. If there are no items
in the list and the fields are grayed out, click the Add
button to activate
the fields on the form so you can fill in the information.
To remove
an item from a list, click on the item
and do one of the following:
- Click
the Delete
button
 to the left of the list.
- Press
[Delete]
on your keyboard.
Some
form sections (e.g., the Applicant
section of the personal, commercial, or agriculture application) allow
you to make changes to contact
information. For example, you may notice that an address is wrong or a
name is misspelled. These sections include an Update Contact Information
link label that lets you save the changes directly from the form so you
do not need to go back to the Contacts
area. Click the link
label to open the Update
Contact Information
screen.
Some tabs and/or screens are disabled (meaning
that they are grayed out and cannot be edited) because they are not associated
with the selected line of business, an item has not yet been added to
the list on the top portion of the screen, or a selection needs to be
made on a different screen or tab. For example, none of the fields on
any of the tabs on the Coverages/Limits of Liability screen are
enabled until you choose a coverage code on the Other Optional Coverages/Endorsements
tab.
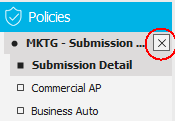
- When you have made the desired changes, click the "X"
next to the correct bulleted item in the navigation panel. Your changes
are saved automatically.

 displays
for these markets.
displays
for these markets.  displays
for these markets.
displays
for these markets. or press
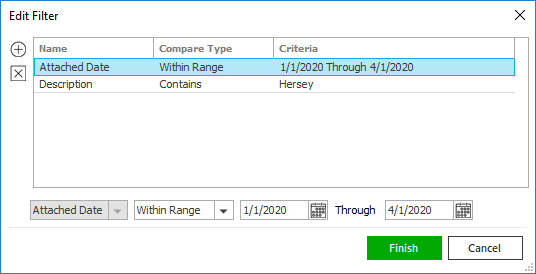
  ) to narrow the list of attachments.