Distribute a File Using the Applied Epic Document Writer
Attach and distribute files from external applications by selecting
the Epic Document
Writer as the printer. Attach files using the Via
option Attach Without Distributing,
and schedule the distribution of these files to recipients via email and/or
fax, or just print a hard copy.
If you access Applied Epic through a web browser, you cannot use the
Epic Document Writer as a printer to attach and distribute files, but
you can still distribute files by attaching them into Epic and performing
the Distribute Attachments action. See the specific instructions in the
Distribute Files in Epic Browser
section.
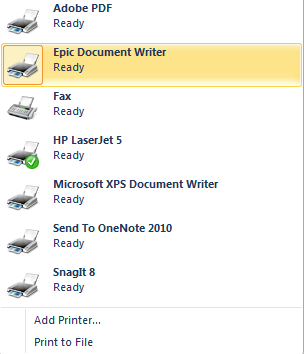
- From any third-party application with printing capabilities (e.g.,
Microsoft Word, Adobe
Reader), access the Print
option.
- Choose Epic
Document Writer from the list of available printers and print
drivers.
- Click Print
(if the file does not print automatically). The Distribute
Files screen displays. All files available for distribution
display in the Available Files
list.
Note: The
PDFs in the Available Files
list are not specific to your Applied Epic user account. They are
specific to your Windows
login.
The Available
Files list purges every seven days. This is a system-wide setting
and cannot be modified.
- Highlight the files
you wish to distribute. To select multiple files, hold down the [Ctrl] key while
making your selections. A preview of the document, image, etc. displays
in the Preview pane once
you click it to help you ensure that it is the correct file and that
it displays correctly.
You can select multiple files to move to the Selected Files
list.
- In the Available Files
list, click one of the items
you want to select.
- Hold down the [Ctrl]
key while clicking the files you want to move.
- Click the Select
file button
 . The selected files display
in the Selected Files
list.
. The selected files display
in the Selected Files
list.
Note:
You can also delete multiple files. In the Available
Files list, hold down the [Ctrl]
key while clicking the files you want to delete and then click the Delete button.
You are prompted, "Are you sure you want to delete the file(s)?"
Click Yes.
- Click the Select
file
 button to move the file(s) to the
Selected Files list.
button to move the file(s) to the
Selected Files list.
Note: To
move all files into the Selected
Files list, click the Select
all files  button.
You can also select all files by holding the [Shift]
key and clicking on the first and last items in the list. Because
this moves all of the available files into the list, all available
files will be distributed. If you have moved a file (or files) in
error, highlight the files
and click either the Deselect
file
button.
You can also select all files by holding the [Shift]
key and clicking on the first and last items in the list. Because
this moves all of the available files into the list, all available
files will be distributed. If you have moved a file (or files) in
error, highlight the files
and click either the Deselect
file  or Deselect
all files
or Deselect
all files  button.
- Once you have moved your desired file(s) to the Selected
Files list, click the Distribution
tab to begin the process of distributing them.
- On the Distribution tab,
define recipient parameters to distribute files to the correct entity.
To select recipients, click the Add
button next to the Distribute Files
To list. The Who to Contact
pop-up displays.
- Search for a contact by first selecting the Account
type from the dropdown menu.
- Enter the recipient's Lookup
code if you know it. If you do not know the complete
lookup code, enter the first three letters and click the lookup button
 .
.
- A pop-up window displays, listing all available matches for the
full or partial lookup code you entered. Select the appropriate entity
and click Finish.
Note: If
you are still unsure or have received multiple results, you can filter
the list using the Search where
options.
- All contacts associated to the lookup code populate in the Contact list.
- To distribute to only one
contact, click the Finish
button.
- To distribute to multiple
contacts, repeat steps 2-4 as necessary.
- Once you have designated your distribution recipients, click the
Finish
button to close the Who to Contact
pop-up. The Account populates in the Distribute
Files To list.
- Make a selection in the Attach
To dropdown menu. The Account
defaults, but you can also attach files at the policy level, line
level, claim level, etc.
- If you select Account,
the selected account code displays in the field. If you select anything
other than Account, click
the lookup
button to the right of the field. Select the correct entity in the
list that displays and click Finish.
Note: Select
the Include History checkbox to include
history items in the list.
- Select your desired delivery method from the Via
dropdown menu:
- Click the Finish
button if you are satisfied with the parameters you have defined.
- A confirmation message displays. Click Yes
to continue, or No
to go back and make changes on the Distribution
tab.
Distribute Files in
Epic Browser
If you access Applied Epic through a web browser, follow the steps below.
If you use the Applied Epic Desktop Client, refer to the steps for the
Epic Document Writer above.
- Locate the
account and access the Attachments area.
- Browse to the file(s) that you want to add to the account and drag
and drop them onto the Attachments
list.
- The Attach To screen displays.
Fill out the detail for the attachment(s) and click Finish.
See the Add an
Attachment – Drag and Drop workflow for step-by-step instructions
on completing the Attach To
screen.
- If you need to convert the files to PDF or merge them into a single
file, do the following:
- Select the file(s) in the Attachments
list. Use the
[Ctrl] or [Shift]
key to make multiple selections.
- Do one of the following:
- Click Actions
> Convert to PDF on the options bar.
- Click Actions
> Convert to PDF on the menubar.
- Right click the attachment and select Convert
to PDF.
- To merge the files into a single PDF, select the Combine files into one PDF checkbox,
then enter a Description
for the PDF.
- Click Finish.
For more information on converting files
to PDF, see Convert
an Attachment to PDF.
- Select the file(s) to distribute in the Attachments
list.
- Do one of the following:
- Click Actions
> Distribute Attachments on the options bar.
- Click Actions
> Distribute Attachments on the menubar.
- Right click the attachment and select Distribute
Attachments.
- The Distribute Attachments
screen displays. On the Attachments
tab, you can view a list of attachments selected for distribution
or add or remove attachments for distribution. Make updates to the
list of attachments if necessary, then click the Distribution
tab.
- To add recipients, click Add
in the Recipients frame.
- Contacts for the selected account display in the Who
to Contact pop-up window. The current Account
Type and Lookup code
default, but you can change them if necessary. Click on a contact
in the list and click Finish
to add the contact to the Recipients
list.
- Make a selection in the Attach
To dropdown menu.
- If you make a selection other than Account,
click the lookup
button in the adjacent field.
- Select the Include
closed checkbox to display closed items in the list.
- Click to highlight the desired item in the list.
- Click Finish
or press [Enter].
- In the Delivery Options
section, make a Via
selection to specify how the attachment(s) will be distributed:
- Repeat the Distribution
tab steps above for each additional recipient.
- Click Finish
to distribute the selected attachments.