Edit a Report
To learn more about this capability, click the Launch video
button.
Launch video
Reports allow you to view specific information for accounts,
depending on the report generated. You can customize reports using the
Report Output Builder. The default
layout includes information such as Client Code, Client Name, Loss Type,
Estimates, Issuing Company, Policy, and any dates associated with a claim.
Note: This
article contains printing instructions that are only applicable if Applied
Epic is installed locally on your computer. If you access Epic through
a web browser such as Google Chrome, Mozilla Firefox, or Microsoft Edge,
you cannot print directly from within the system. See Printing
for more information about the printing capabilities available from Epic
Browser. All other steps in this article are applicable to both methods
of accessing Epic unless stated otherwise.
If you access Applied Epic using a web browser, you must install Layout Builder
from Help > Connection Suite
to add and edit layouts.
- Access the
Reports/Marketing area.
- The My Reports list defaults
when the Reports/Marketing
screen opens. If the report is in a different list, click the button
for that list on the navigation panel, or click on My
Reports in the view filter and make a different selection.
- Click to highlight the existing report.
- Do one of the following:
- Click the Edit
button
 .
.
- Double click the report.
- Press [Ctrl]+O
on your keyboard.
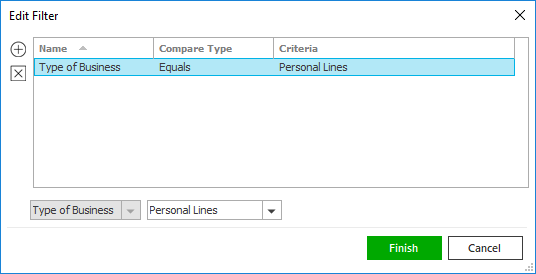
- The Criteria screen displays.
Click on a criterion
to change specific items on the report. For example, click on Agency to select the agencies to be included/excluded
in the report.
- Click the Include
Selections or Exclude
Selections radio button to specify whether the items in the
Selected list are to be included
or excluded in the report.
- The fields and/or lists on the right vary, depending
on your criterion selection in the main list:
- Each report includes a special criterion called Parameter
Page. When you include it, the first page of the report lists
all of the criteria you used to generate the report, so you can refer
to them later. If you do not want a parameter page, select the Parameter Page
criterion and click the Exclude
Parameter Page radio button.
- Include
additional criteria if desired.
- Optionally click Layouts
on the navigation panel to change the report layout.
- Click to highlight a layout
in the list. Instead of using a saved layout, you can also opt to
create a new layout or edit an
existing layout. Once you are done creating or editing the layout,
the Detail section allows
you to changed the layout’s Name
and/or Description for any
language.
Note: To delete
a layout in the list, click on the layout
and click the Delete
button. You are prompted, "Do you wish to delete this record? Click
Yes.
- Click
Delivery Options
on the navigation panel.

- Specify
where (or to whom) the report is to be sent. Current
User, meaning the person who is running the report, is a report
recipient automatically. You can do the following here:
You
can also save
an electronic copy of the report.
- If any
recipients are to receive the report via email or fax, enter a Subject and
Message
for the fax and/or email in the Email/Fax
Detail section.
Note: The Subject field is required.
- If any
recipients will receive the report via email, select a From email address. See Distribution
Email Accounts for instructions on adding email addresses to this
list.
- If any
recipients will receive the report via fax, select a Cover page in the dropdown menu. To change
the Language of the selected
Cover page, select it from
the Language
dropdown menu.
Note: You
must set up a Cover page
in all desired languages in Fax
Cover Page Configuration to make these languages available for
selection from this dropdown menu.
To change the name that prints on the fax as the sender, click the
Change Sender
link label. In the Change Sender
pop-up, select a Name
from the dropdown menu. Optionally add a Fax
number with Ext,
Phone number
with Ext,
and Email address
to print on the fax. Click Finish.
Note: Some
reports filter based on each user's structure access. That means that
if a report has two recipients, the final report that each recipient
receives might differ, since they may have different structure access.
It does not matter who initially created the report, whether it is
in My Reports or Report Quick View, etc. Click here
for a list of reports that filter based on structure.
- In the Scheduling section,
opt to run the report Now,
or Schedule
it to run later.
If you
choose Schedule, enter a date (or choose
a date from
the dropdown calendar) and time
for the report to run. Select a Recurrence
option:
- One Time Only
- Every Weekday (M-F)
- Daily
- Weekly
- Monthly
- Quarterly
- First Day of the Month
- Last Day of the Month
If you
choose anything but One Time Only,
the report runs automatically at the chosen interval at the time indicated
in this section. Consider setting up lengthier reports to run after business
hours.
Marketing
options are available for some
reports. If you intend to generate letters, use
an email template, add activities to accounts, or send text messages
based on the report results, you must set up a new email
template, letter
template, activity
category, and/or SMS
message template before configuring marketing options. The templates
are used for the emails, letters, or text messages sent through the
campaign; the activity category helps you track the campaign's effectiveness.
Do one of the following:
- Click
Actions
> Generate
Report on the options bar.
- Click
Actions
> Generate
Report on the menubar.
If you
opted to launch a marketing campaign in step 18, you may or may not need
to take an additional action:
- If you did not select
the Preview/Edit results before
processing option in step 18, your marketing campaign launches
now.
- If you did select the
Preview/Edit results before
processing option in step 18, you must launch
the marketing campaign from the Marketing area in order to
generate the appropriate letters, activities, etc.
- When you exit the screen, you are prompted, "Do you want to
save changes?"
Click Yes
to save the changes you made to the report.
Click No
if you do not want to save the changes you made to the report.
Click Cancel
to remain on the Delivery Options
screen.

 to the left
of the list to open the
to the left
of the list to open the  to return to the previous
folder.
to return to the previous
folder. .
. to the right of the
  to the right of the
  .
.
 .
.