- Click the Add
button
 to the left of the list.
 - Click New on the options bar and select Employee.
- Click File > New > Employee on the menubar.
- With focus on the list, press [Insert] on your keyboard.
- Press [Ctrl]+N.
Employee accounts enable you to save employees’ contact information and personnel records, define the types of business they service, designate them as producers or sales team members, and enter their sales targets.
When adding a new employee, you must complete the following items:
Note: This article contains printing instructions that are only applicable if Applied Epic is installed locally on your computer. If you access Epic through a web browser such as Google Chrome, Mozilla Firefox, or Microsoft Edge, you cannot print directly from within the system. See Printing for more information about the printing capabilities available from Epic Browser. All other steps in this article are applicable to both methods of accessing Epic unless stated otherwise.
To add the new employee account, do the following:
To access Accounts from the Home screen, do one of the following:
To access Accounts from another area of the program, do one of the following:
to the left of the list.
 to look up
the correct postal code.
to look up
the correct postal code.
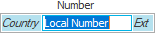
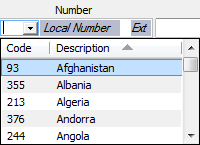
The Country
code populates. Enter the remainder of the phone number in the
field.
Note: See Telephone Country
Codes Configuration for instructions on adding, editing, or removing
a country code.
 to the right of either
email field. An email opens in Outlook
with that address in the To
field.
to the right of either
email field. An email opens in Outlook
with that address in the To
field. to the left of the list.
Employee Detail displays with the
following tabs:
This tab contains basic information about the employee. It contains the following areas:
|
|
The Country
code defaults. Enter the remainder of the phone
number in the field.
Note:
See Telephone
Country Codes Configuration for instructions on
adding, editing, or removing a country code.
Note:
To email the employee from this screen, click the
Email
button to
the right of either email field. An email message
with that address in the To
field.
Use this text box to enter any additional comments.
The employee account’s Structure associations limit the list of servicing roles to which the employee may belong. Define security for the employee's login to specify the employee’s security access to view accounts.
You can associate the account to multiple structures.
This tab indicates the employee's function(s) within the organization, shows whether the employee's account has a parent account, and allows you to make General Ledger selections for the employee. It contains the following areas:
See the instructions for adding and removing Servicing Roles in step 17 above. See Servicing Roles Configuration for instructions on setting up the Servicing Roles available for selection.
Select
the Commissionable
producer check box if it applies to the
employee.
Note:
Selecting this checkbox enables the Automatically
post to GL, Reconcile (if your system is
configured to reconcile producers in System Settings), and Batch payment method
options.
Note:
To view how this producer's commissions are reconciled/paid
on agency and direct bill items for all agencies
in your system, click the Agency/Direct
Bill Commissions link label. The Agency/Direct Bill
Commissions window displays. To print a
list of the agencies installed and their commission
payment methods for this producer, click the Print
icon to the left of the list. When you are finished
reviewing information, click Close.
If the method is set to Accounting
Method, it means the producer is paid based
on the way the agency has been installed to post
producer commissions to the General Ledger in
Accounting
Methods Configuration.
You may change the agency and/or direct bill commission
payment method for this producer for any or all
agencies via the Modify
Agency/Direct Bill Commission action.
Select the Receives 1099 checkbox if this employee should receive a 1099 tax form.
Optionally select the Reconcile checkbox. This enables you to reconcile commission payable statements for this employee in the Reconciliations area. Checking Reconcile enables the Producer Payable Contracts frame below.
Optionally select the Automatically post to GL checkbox. Checking this box allows Applied Epic to create month-end journal entries for this producer for each transaction with which he or she is associated. If this box is checked, the organization does not have to keep track of the total commission that the producer is supposed to receive; it is calculated automatically within the Month-end Journal entry.
If you selected the Automatically post to GL checkbox, select Disbursement or Journal Entry in the Batch payment method dropdown.
The employee's GL subaccount displays below the Batch payment method. To change the GL subaccount, follow the instructions in Modify General Ledger Subaccount.
To allow the employee to be added on the Pr/Br tab of new policy lines, select the Allow on new business checkbox.
To allow the employee to be added on the Pr/Br tab of renewed policy lines, select the Allow on renewal business checkbox.
If you selected Reconcile in the Producer frame, you can optionally select the Require payable contracts checkbox. This allows you to determine when and how the producer will be paid, and enables you to reconcile commissions for this producer by the payable due date.
The following workflows are available in this area:
 next
to the list.
next
to the list.The Contract type defaults as Commission Payable and cannot be changed.
Select
a Payable
due date:
Choose + or - in the next dropdown menu and enter the appropriate number in the Days field.
To apply this contract to every
branch, leave the All
radio button selected.
To specify the branches to which the contract
applies, click the Selected radio
button and select the checkboxes
for the appropriate branches.
 next to
the list.
next to
the list.Choose + or - in the next dropdown menu and enter the appropriate number in the Days field.
Optionally change the agencies/branches to which this contract applies.
next to
the list. to the left of the Producer
Payable Contracts list.
to the left of the Producer
Payable Contracts list.The fields on the Share Revenue tab are only enabled if the employee is a commissionable producer.
Revenue sharing is used when different offices collaborate in servicing an account. When revenue for a certain line of business needs to be allocated across multiple structural organizations (agencies, branches, departments, or profit centers), producers can be installed to share revenue for that line of business. This can be done in two ways:
For more information on how revenue sharing producers are added to a policy and how those policies are billed, see Share Revenue - Policies and Share Revenue - Transactions.
You can also list Additional Structures where this producer may be used as a resource. This is not required, but it might be necessary if a producer does business in more than one office/location. These structures will be available for selection as the revenue sharing structure when the producer is added to a policy.
Click the Selected checkbox above the appropriate field at the top of the screen to narrow available structures for this producer by Region, Agency, Branch, Department, or Profit Center. If you do not click any of the Selected checkboxes, you will be able to use this producer to share revenue for any structural combination, including any new structures added to your system in the future. If you clicked Selected for at least one structural level, do the following:
This section contains personal information and emergency contact numbers for the employee. It contains the following areas:
 to hide
the information in this field (if you must leave
your desk, for example). After several seconds,
each digit is replaced with an X to hide this
information . To view or revise information in
to hide
the information in this field (if you must leave
your desk, for example). After several seconds,
each digit is replaced with an X to hide this
information . To view or revise information in
 this
field, click on the padlock
again. to the right
of the email field. An email opens in Outlook
with that address in the To
field.
this
field, click on the padlock
again. to the right
of the email field. An email opens in Outlook
with that address in the To
field.In the Identification Numbers area, you can add, edit, or delete identification numbers and related information for the employee.
You can add multiple State Producer License Numbers and Tax ID Numbers, but the State value for each number of these two types must be unique.
Note: To include inactive Identification Numbers in the list, click the Include Inactive link label.
to the left of the list,
or press
[Insert] with focus on the list. to the left of the
list. to the left of the list
or press [Delete].This tab is used to keep track of an employee's employment and compensation. It contains the following areas:
In this frame, you can grant other employees access to use this employee's electronic signature when issuing/printing forms. Employees are automatically authorized to use their own signatures, and users with Enterprise Admin rights automatically have access to employee signatures as well.
Signatures for which an employee is not authorized do not display in the Scanned Signatures dropdown menu in the Distribution Manager.
Select the appropriate
radio button in the Add
Authorization pop-up window:
Click the Select All link label if all employees are to have access to this person's signature.
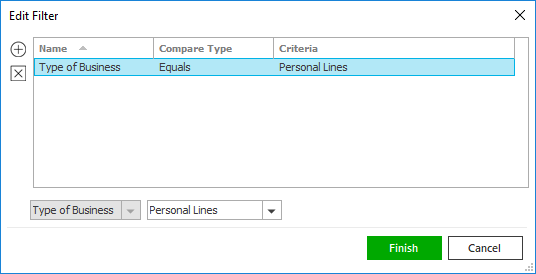
To narrow the list of employees, use the filter above the list.

These are the choices in the first dropdown menu:
The following choices are available in the second dropdown menu:
You can apply multiple filters if necessary.
 .
. 
Select the employee who will have access to the signature on the selected account.
Click
Add
to add the highlighted employee and
add another one.
Click Finish
if there are no other signatures to
add.
Note: Security groups are set up in Group Security Configuration.
Click the Select All link label if all security groups are to have access to this employee's signature. You may also use the checkboxes to the left to select individual security groups.
Click Add
to add the selected security group(s)
and select another one.
Click Finish
if there are no other security groups
to add.
To remove an authorized
signature user from an employee's Authorized
Signature Users list, click to highlight
the desired User
and do one of the following:
This tab determines which employees’ activities, tasks, myEpic workflows, renewals, and opportunities are available to display for this employee on the Home screen and in Renewals Manager. See View These Employees' Work Items for more information about this functionality.
To add an employee to the selected employee’s list for one
or more of these item types, click the Add
button to the left of the View
These Employees' Work Items list.
Note: Click the Include Inactive link label to include inactive employees in the search.
Note:
You can change the selections later by selecting the employee
on the View Others
tab and clicking the Edit
button.
to the left of the View Others’ Opportunities
list.
These are the choices in the first dropdown menu:
The following choices are available in the second dropdown menu:
These are the choices in the first dropdown menu:
The following choices are available in the second dropdown menu:
These are the choices in the first dropdown menu:
The following choices are available in the second dropdown menu:
The Sales tab contains the following sections:
Use this section to designate the employee as a member of sales teams defined in your system. For instructions on adding new sales teams to the system, see Sales Team Configuration.
.Use the search bar above the list to specify the sales teams that you want to see.
These are the choices in the first dropdown menu:
These are the choices in the second dropdown menu:
Click Find.
You can apply multiple filters if necessary.
.
to the left of the list.Use this section to define Sales Targets for the employee. These targets enable the employee, as well as the employee’s Sales Manager and the principals of your organization, to quantify and track the employee’s sales performance.
.These fields correspond to fields available on the Opportunity Detail screen. The values entered in Opportunity Detail for opportunities assigned to this employee will be counted toward the employee’s Sales Targets on the New Business YTD dashboard on the Home screen as the employee wins those opportunities.
Use the search bar above the list to specify the categories that you want to see.
These are the choices in the first dropdown menu:
The choices in the second dropdown menu vary, depending on the selection you made in the first dropdown menu:
To see the filter that is currently applied to the list, hover over the Search where text.
You can apply multiple filters if necessary.
.
next to
the list. next to
the list.
to the left of the Sales
Targets list.Note: Sales targets for individual employees will be added together to calculate team sales targets for the Sales Team to which each individual target is associated. Team sales targets are used to generate the data that displays on the Dashboard charts available to the team’s Sales Manager.
The Categories/History tab contains the following sections:
Use this section to apply agency-defined categories to an account. For instructions on adding new agency defined categories to the system, see Agency Defined Categories Configuration.
.Use the search bar above the list to specify the categories that you want to see.
These are the choices in the first dropdown menu:
There is one choice available in the second dropdown menu.
To see the filter that is currently applied to the list, hover over the Search where text.
 button or press [Delete] on your keyboard. You
are prompted, "Do you wish to delete this
record?" Click Yes.
button or press [Delete] on your keyboard. You
are prompted, "Do you wish to delete this
record?" Click Yes.Use the History section if this account was pulled into Applied Epic via a data conversion.
The relationship feature allows you to keep track of accounts that are related to one another, such as a main account and subaccount. For information on making changes to the available relationships in Applied Epic, see Define Relationships.
To add a relationship to the account, do one of the following:
Click
the Add
button .
With focus on the list, press [Insert] on your keyboard.
On the Add Relationship screen, begin by identifying the account to which the selected account is related. Make the appropriate selection in the first dropdown menu of the search bar:
Account Name
Lookup Code
Make a selection in the second dropdown menu:
Equals: If you select Equals, enter the entire lookup code, account name, or account type in the field provided.
Contains: If you select Contains, enter at least one letter of the lookup code, account name, or account type in the field provided.
Click Find or press [Enter] to bring up a list of matching accounts.
Click
on the appropriate account
in the list and click the down
arrow button to move the account to the
Selected
list. To select all of the accounts in the list,
click the double
down arrow button.
Note:
Press the [Ctrl]
or [Shift]
key as you click on accounts in the list to choose
more than one. To remove an account from the Selected list,
click on the account
and then click the Delete
button to the left of the Selected list.
Choose the appropriate relationship Type.
Choose the Role of the account that you are editing.
Click
Finish
to add the new relationship.
Click Add
to add the new relationship and apply another.
Click Cancel
to close the window without saving any changes.
When you have made the desired changes, do one of the following:
