Add a Company

Note: This article contains printing instructions that are only applicable if Applied Epic is installed locally on your computer. If you access Epic through a web browser such as Google Chrome, Mozilla Firefox, or Microsoft Edge, you cannot print directly from within the system. See Printing for more information about the printing capabilities available from Epic Browser. All other steps in this article are applicable to both methods of accessing Epic unless stated otherwise.

Follow the steps below to add a carrier.

  1. Access the Accounts area.
  2. Select Company in the Locate Account dropdown menu of the Account Locate screen.
  3. Do one of the following:
  4. The Add Company Account screen displays. Any applicable field defaults set for the Company Add workflow populate. Setting field defaults streamlines the workflow by lessening the amount of information you must enter each time you add a new company.

    In the Account section, select the Billing company checkbox if the company you are adding is a billing company. Select the Issuing company checkbox if the company you are adding is an issuing company.

  5. If you select the Issuing company checkbox but not the Billing company checkbox, select the company’s associated Billing company in the dropdown menu.
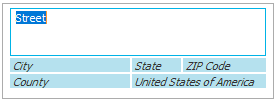
  6. Enter a Prefix, business Name, and Suffix. The Name field is outlined in red to indicate that it is required. For information on capitalization settings that may be applied to proper names automatically, click here.

  7. Click the Create Account Name/Code button to generate an account name and code automatically.
  8. Select the checkbox for each Type of business that applies to the company. Click the Select/Deselect All link label to toggle all checkboxes. These selections limit the companies (issuing and billing) available for selection on a policy to only the relevant options. The company will display in the Issuing Company and/or Premium Payable dropdown menu only for policies of the selected types of business.
  9. Click in the large field in the Address/Phone Number section. Enter the Street, City, State, and County in the highlighted fields that display.

  1. Enter the correct Zip Code, or click the lookup button to look up the correct zip code.
  2. The Country defaults to United States of America.
  3. Optionally enter a Description for that address, or select a new Description from the dropdown list.

    Note: Typing a description in the field provided might not be an option, depending on how your agency has set up address descriptions. See Contact Description Configuration for more information.
  4. In the Phone Numbers/ Website section, enter the Phone Number and Extension, and a Description of the phone number.
  5. Enter the Fax Number and Ext, and a Description of the fax number.
  6. Enter the address of the company's Website.

    Note: To view the company's website from this screen, click the hyperlink button to the right of the Website field. The Website opens in your browser.
  7. Enter details for the Primary Contact. This creates an Individual contact. If you do not enter these details, the system creates a Business contact using the Account information above.
  8. You can assign Structure information to the account. Click the Selected radio button and choose the Agency, Branch, Department, and Profit center to which this account belongs. Only users with access to that structure can see the account.
  9. Optionally add Comments.
  10. You can click Finish or press [Enter] to end the workflow at this point. However, it is advisable to click Detail and add the rest of the company information at this time.

    Click Cancel or press [Esc] to exit the workflow without saving the information. You are prompted, "Do you wish to discard changes?" Click Yes.

    Click Detail to fill in more information.

    If you click Finish or Detail, the system checks to ensure that a similar account does not already exist in the system. If this check finds a similar or duplicate account, it warns you. See Duplicate Accounts Search for more information.
  11. The Company Detail screen displays. The Account section displays the Account name and Lookup code. For information on capitalization settings that may be applied to proper names automatically, click here.

    The Do not purge checkbox indicates whether attachments for this account are exempt from the Attachment Purge utility. When this box is checked, the account’s attachments are excluded from the purge even if they meet the purge criteria.

    The screen contains the following tabs:
  12. When you have made the desired changes, do one of the following:
See Also