Add a Policy
To learn more about this capability, click the Launch video
button.
Launch video
Adding
a policy enables you to enter basic information about it, before providing
additional information in Policy Detail.
Note that you cannot designate Required
or Desired fields on the Add a Policy screen, as requirements
vary by line type. Designate any required/desired fields in policy/line
detail instead.
Note: This
article contains printing instructions that are only applicable if Applied
Epic is installed locally on your computer. If you access Epic through
a web browser such as Google Chrome, Mozilla Firefox, or Microsoft Edge,
you cannot print directly from within the system. See Printing
for more information about the printing capabilities available from Epic
Browser. All other steps in this article are applicable to both methods
of accessing Epic unless stated otherwise.
- Locate the
account in question and access the Policies area.
- Do one
of the following:
- Click
the Add
button
 on
the Policies screen.
on
the Policies screen.
- Click
New
on the options bar and select Policy.
- Click
File >
New > Policy on the menubar.
- Press
[Insert]
on your keyboard.
- Press
[Ctrl]
+ N.
- The Add
a Policy screen displays. Any applicable Field
Defaults for the Policy Add
workflow populate.
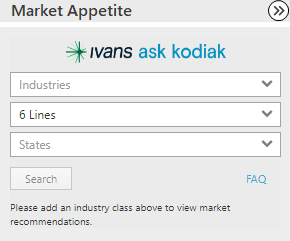
A Market Appetite sidebar
displays on the right hand side of the screen if you are adding a
policy for a client whom the system recognizes as a commercial lines
client. Perform a Market
Appetite search in this sidebar to locate carriers
with appetite for this client’s commercial risk who might be interested
in writing this policy. Market Appetite integrates with Ask Kodiak
to provide you with current, accurate appetite information supplied
by each carrier.
- In the Policy
Detail section, select a radio button to specify whether
this is a Prospective
or Contracted
policy.
- Select a policy Type
in the dropdown menu.
Note: See
Policy Type Configuration for instructions
on adding new policy types.
- The Description, Effective Date,
and Expiration Date
default. You may edit them if necessary.
- Enter a Policy
# if known.
- Optionally select the Source
that compelled the client to contact you.
Note: See
Policy Source Configuration for instructions
on how to add new sources.
- Select the Turn
off Policy Download checkbox if you do not want Download to
overwrite existing policy data.
- Select the Multi-Carrier
Schedule radio button if this policy is a participation or
subscription policy where multiple carriers share the risk, or select
the Multi-Commissions
radio button if this policy will have multiple commission classes.
Leave the None
radio button selected if the policy will have a single carrier and
standard commissions.
- In the Structure section,
the Agency, Branch,
and Department that were
selected when the client was added default in the Agency
and Branch fields. These
cannot be changed.
- In the Policy Estimated Premium/Commission
section, optionally enter an estimated Premium
and an estimated Commission.
- In the Lines of Business
section, select the correct Line.
The selection you made in the Type
fields defaults in this field.
- Select a Status
from the dropdown menu.
- The Issuing Location defaults
based on the client’s mailing address if it is set up to do so in
Policy Type
Configuration or Field
Default Configuration. Otherwise, it defaults blank. Update it
if necessary.
- Click the Agency
Bill or Direct
Bill radio button to specify how this policy will be
billed.
- Select the appropriate Profit
center.
- Choose an Issuing
company.
Select the correct
Premium Payable
type:
- BR Broker (External)
- CA Carrier
- IN Broker (Internal)
- Choose a different Premium
Payable account if necessary.
- Select a Payable
Contract if applicable.
Note: This
field is available only for agency billed policies.
- Select a Prefill
if applicable.
- In the Line Commission
section, select the Use
commission agreement checkbox to use an existing commission
agreement. If you select this checkbox, select an Agreement
from the dropdown menu.
- To change the Type, Percentage,
or Amount
of commission for this policy only, select the Override commission agreement percentage/amount
checkbox. Changing these amounts does not change the commission
agreement for any other policies.
- Select Flat
Fee or Percentage
of Premium in the Type
dropdown menu.
If you select Percentage of Premium,
enter the Percent.
If you select Flat Fee, enter
the Amount.
- In the Line Estimated Premium/Commission
section, enter the Premium
amount for this line of business, if known.
- Enter the Commission
amount (if known), or click the Calculate
link label to compute the line-level commission amount.
The calculation is available for all commission agreement types, including
premium-based, date-based, and risk-based agreements. You can only
calculate commission for a risk-based agreement on the policy’s Servicing/Billing > Line tab
after adding the policy. To understand how the system calculates the
estimated commission and view examples, click the How
is this calculated? link label.
- You can click Finish
or press [Enter]
to end the workflow at this point. However, it is advisable to click
Detail and add the rest of
the policy information at this time.
Click Cancel
or press [Esc]
to exit the workflow without saving the information. You are prompted,
"Do you wish to discard changes?" Click Yes.
Click Detail
to add more policy information.
- The Policy Detail screen
displays. The navigation panel expands to show the available categories
for the selected policy. Click a category to show its specific sections
on the policy. Click a specific section
to view or fill in the information related to that section. A form
displays on the right. View or update the contents of the fields as
necessary.
- All policies contain a Servicing/Billing
section with the following screens:
- When you have made the desired changes, click the "X"
next to the correct bulleted item in the navigation panel. Your changes
are saved automatically.
If this is an
In-Process policy, you are
prompted, "This policy's stage is 'In Process.' Have you completed
policy editing?" Select the appropriate radio button:
- No,
leave "In Process"
- Yes, perform action
If
you select Yes, choose the correct
action to take:
Note: You must fill out the Distribution
tab.
- Click Finish
or press [Enter]
to complete the process.
Click Cancel
or press [Esc]
to exit the workflow without submitting an application.
Prefills
If
you click a section for which you defined a prefill,
you can apply that prefill to the application. For example, if you have
prefills that include standard coverages for a Business Auto policy, you
can go to the Business Auto application and apply the prefill. If the
application is an ACORD form, Custom Form, or Supplemental Screen, click
Actions > Select
Prefill on the options bar or menubar to apply a prefill. See Select Prefill for more information.
For a policy/plan detail form, apply a prefill by clicking on
the Application
Detail section and then clicking the Select Prefill button. The button
only displays if prefills
are defined for the form. See Policy/Plan
Data Capture Forms for more information.
Expanding lists
A list displays at the top of many forms. To expand the list, click
the bottom of the frame and drag the cursor down the screen.

Adding/Editing Data
To view
or revise information on these forms, select the correct line in the list. If there are no items
in the list and the form is grayed out, Click the Add
button . The fields
on the form are activated, allowing you to fill in the information.
Various
tabs display below the list. Each tab contains different fields. To view
or revise information in these fields, select the correct line in the list. If there are no items
in the list and the fields are grayed out, Click the Add
button . The fields
on the form are activated, allowing you to fill in the information.
To remove
an item from a list, click on the item
and do one of the following:
- Click the Delete
button
 to
the left of the list.
to
the left of the list.
- Press [Delete]
on your keyboard.
Add a Line of Business
- Click Servicing/Billing
on the navigation panel, and then click Line.
- The list on the right shows all of the lines of business associated
with the selected policy.
- Click the Add
button to the
left of the list.
- The Add a Line of Business window displays.
Select a policy Line
and a Status.
These fields are required.
- The Issuing location defaults in but
can be changed. This field is required.
- Select the Agency or Direct radio button to indicate
how the line of business will be billed.
- Select the Tax
option if the line is taxable. When transactions are entered
on this line, government taxes and fees will be generated according
to the setup defined in Government
Tax/Fee Rate Configuration. The billing associate entering the
transaction can review the tax/fee information and make any necessary
changes before committing.
Note: You
can set up the Tax option
to default for all lines of this type in Policy
Type Configuration.
- Select a Profit
Center. This field is required.
- The Issuing Company and
Premium Payable information
defaults in from the policy if the policy is not set up for multiple
carriers. If the policy is set up for multiple carriers, you can select
a different Issuing
Company and/or different Premium
Payable options.
- The Payable Contract defaults
but can be changed if necessary.
- Make the appropriate Prefill selection
if applicable.
- In the Line
ID field, enter an identifying number, such as a group
ID number, if applicable.
- Optionally enter the number of Risks
insured and Total
eligible risks and a description for each value.
Note: Risks insured and Total eligible values may
differ. For example, only 20 tractor trailer risks might be insured
out of a fleet of 30.
The Plan option name is an identifier used for benefits plans that
have multiple lines with the same type of business, such as GMED –
Group Medical. Giving each line a unique Plan option name makes it
easier to distinguish the lines from one another. If applicable, enter
a name
in the Plan option name field.
If you use the Applied Benefits Designer integration, the ABD Plan
Name defaults in the Plan option
name field.
- Select the Use
commission agreement checkbox if you would like to choose a
default commission agreement for this line of business. If you select
this checkbox, select an Agreement
from the dropdown menu.
- To change the Type, Percentage,
or Amount
of commission for this policy only, select the Override commission agreement percentage/amount
checkbox.
- Optionally select Flat
Fee or Percentage
of Premium in the Type
dropdown menu.
If you select Percentage,
enter the Percent.
If you select Flat Fee, enter
the Amount.
- Enter the Line Estimated
Premium
and Commission
(if known), or click the Calculate
link label to compute the line-level commission amount.
The calculation is available for all commission agreement types, including
premium-based, date-based, and risk-based agreements. You can only
calculate commission for a risk-based agreement on the policy’s Servicing/Billing > Line tab
after adding the policy. To understand how the system calculates the
estimated commission and to view examples, click the How is this calculated? link label.
- Click Finish
or press [Enter]
to complete the workflow.
Click Add
to complete this line of business and add another one to the same
policy.
Click Cancel
or press [Esc]
to exit the workflow without saving the information. You are prompted,
"Do you wish to discard changes?" Click Yes.
- Fill in the information for the new line of business on the remaining
tabs. You can also make further updates to the information on the
Line tab. If
you have added more than one line of business, highlight one line
at a time and enter the information for each line.
- Update the information in the Line
Information and Line
Commission frames as necessary.
- Update the information in the Premium
and Commission
frames as necessary.
- If desired, enter Annualized,
Estimated, and/or Estimated
monthly premium or commission values.
To calculate the Estimated monthly
premium and total annual premium (which displays in the Estimated field) for a Benefits
line that uses a custom form with a Policy
Information section, click the Calculate
link label. Click the link label for each line on the policy to
total all of the monthly premiums calculated on the Plan/Rate
Information > Rate Information tab and display them
at the line level.
- If there is an amount in the Estimated
monthly premium field, you can also click the Calculate link
label in the Commission
frame to calculate the estimated monthly commission.
If you are billing a package policy as a whole (rather than billing
each line individually), click Calculate
at the policy level to calculate the estimated premium and/or
commission. This calculation provides a policy-level total and
sums the estimated monthly amounts for all lines, which populate
in the Estimated and
Estimated Monthly fields,
respectively.
- If the line is for a Benefits
or Life
& Health plan and you would like to perform calculations
for commissions weighted by premium, click the Weighted Commissions link label.
The Weighted Commissions window
displays all of the client’s Benefits
and Life & Health plans. To calculate weighted
commission percentages and line estimated or line estimated
monthly commission for a plan, select the plan
and click the single
down arrow button to move it to the Weighted
Commission Calculation list.
Repeat this step to add additional plans to the Weighted
Commission Calculation list, or click the down double arrow button to perform
calculations for all available plans.
The system only applies calculations to plans that have an
estimated premium amount and use the same commission information.
For detailed information on the estimated commission calculation,
including examples, click the How
is this calculated? link label.
To export the calculations to a Microsoft
Excel file for analysis, click the Print
button beside the list and select the Print
to CSV file checkbox.
To replace
the commission value on the Line
tab with the calculated value from the Weighted
Commission Per Line column for each plan selected in
the Weighted Commissions
Calculation list, click the Apply
Calculations button.
Do one of the
following to save your changes:
- Click Save on the options bar.
- Click File > Save on the menubar.
- Press
[Ctrl]
+ S.
Remove a Line of business
- To delete a line in the list, click the line and click the Delete button
or press [Delete] on
your keyboard.
- You are prompted to confirm the deletion. Click Yes.
Contact Information
Some
form sections (e.g., the Applicant section of the Personal or Commercial
AP) allow you to make changes to contact
information. For example, you may notice that an address is wrong or a
name is misspelled. These sections include an Update
Contact Information link label that lets you save changes to this
area right from the policy application so you do not need to go back to
the Contacts area to do so. Click
the label to open the Update
Contact Information
screen.
Disabled Screens and Tabs
Some
tabs are not enabled (meaning they are grayed out and cannot be edited)
because they are not associated with the selected line of business.
Some
tabs are not enabled (meaning they are grayed out and cannot be edited)
until you add an item to the list on the top portion of the screen.
Some
screens or tabs are not enabled (meaning they are grayed out and cannot
be edited) until you make a selection on a different screen or tab. For
example, on the Coverages/Limits of
Liability screen, none of the fields on any of the tabs are enabled
until you choose a coverage code on the Other
Optional Coverages/Endorsements tab.
Tips
Press
[Alt] + [Shift]
and the left arrow
key to move from application detail to the selected line of business
in the navigation panel. The selected item/application is outlined in
orange.
Continue
to press [Alt] +
[Shift] and use the up
and/or down arrow
key to move to another policy or section or to view a different
area for the selected account.
Continue
to hold [Alt] + [Shift]
and use the right or left
arrow key to move the subsections
under the primary section.

 displays
for these markets.
displays
for these markets.  displays
for these markets.
displays
for these markets.

 on the
  beside the list. The
 beside the list. The
  .
. to choose an
underwriter from a pop-up window. Double click
the appropriate
to choose an
underwriter from a pop-up window. Double click
the appropriate  . The
. The  to launch a
new email message from this screen.
to launch a
new email message from this screen.